

In a world painted with myriad hues, colors hold the power to evoke emotions, convey messages, and create lasting impressions. For artists, the process of translating inspiration and color schemes from reference images or photographs onto the canvas is both a delicate process and a challenging endeavor. In this tutorial, Tom Gallovich takes on the task of repainting his photographs while demonstrating an easy way to trace colors in Rebelle.
This blog post is available in German as well. We thank Ingo Heidelberg for the translation.
Tom Gallovich enjoys photography, traditional painting as well as digital watercolors and oils. His photography and paintings are displayed in several local and online galleries. His YouTube channel provides educational watercolor and oil painting demos, explaining Tom’s creative process and art principles in great detail.
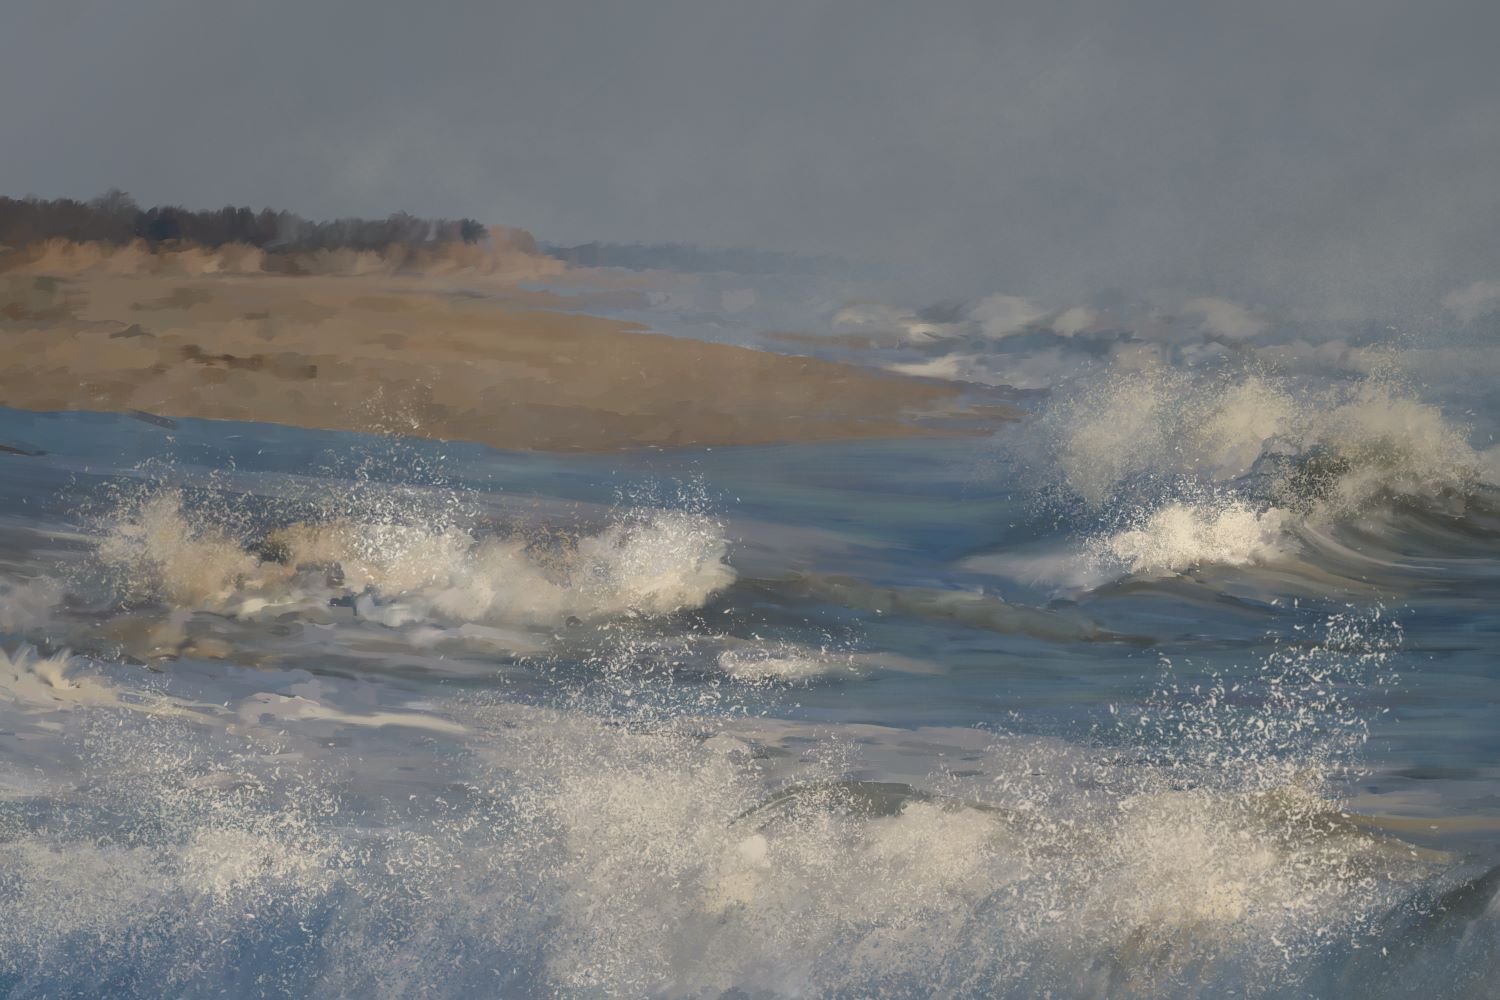
If you are unfamiliar with digital painting or are just transferring to Rebelle from other painting software, it might be quite challenging to trace colors. In the past, Tom Gallovich provided a great tutorial on tracing using Rebelle 4. Due to settings changes in later Rebelle versions, Tom now comes with a new demonstration of this feature. Several photographs of splashing waves and migrating snow geese will serve as an example to showcase how to trace colors in Rebelle.
Prepare Your Reference Image
Rebelle enables us to create paintings by tracing colors from a selected image. You can Drag and Drop pictures directly from any source - folder, browser, or website and they open as a new layer. For this demonstration, I chose a group of my photographs capturing waves at the beach shore with geese flying above. Each image is set to be on its separate layer for easier manipulation while making changes to the size and proportions of these images while trying to create a desired reference.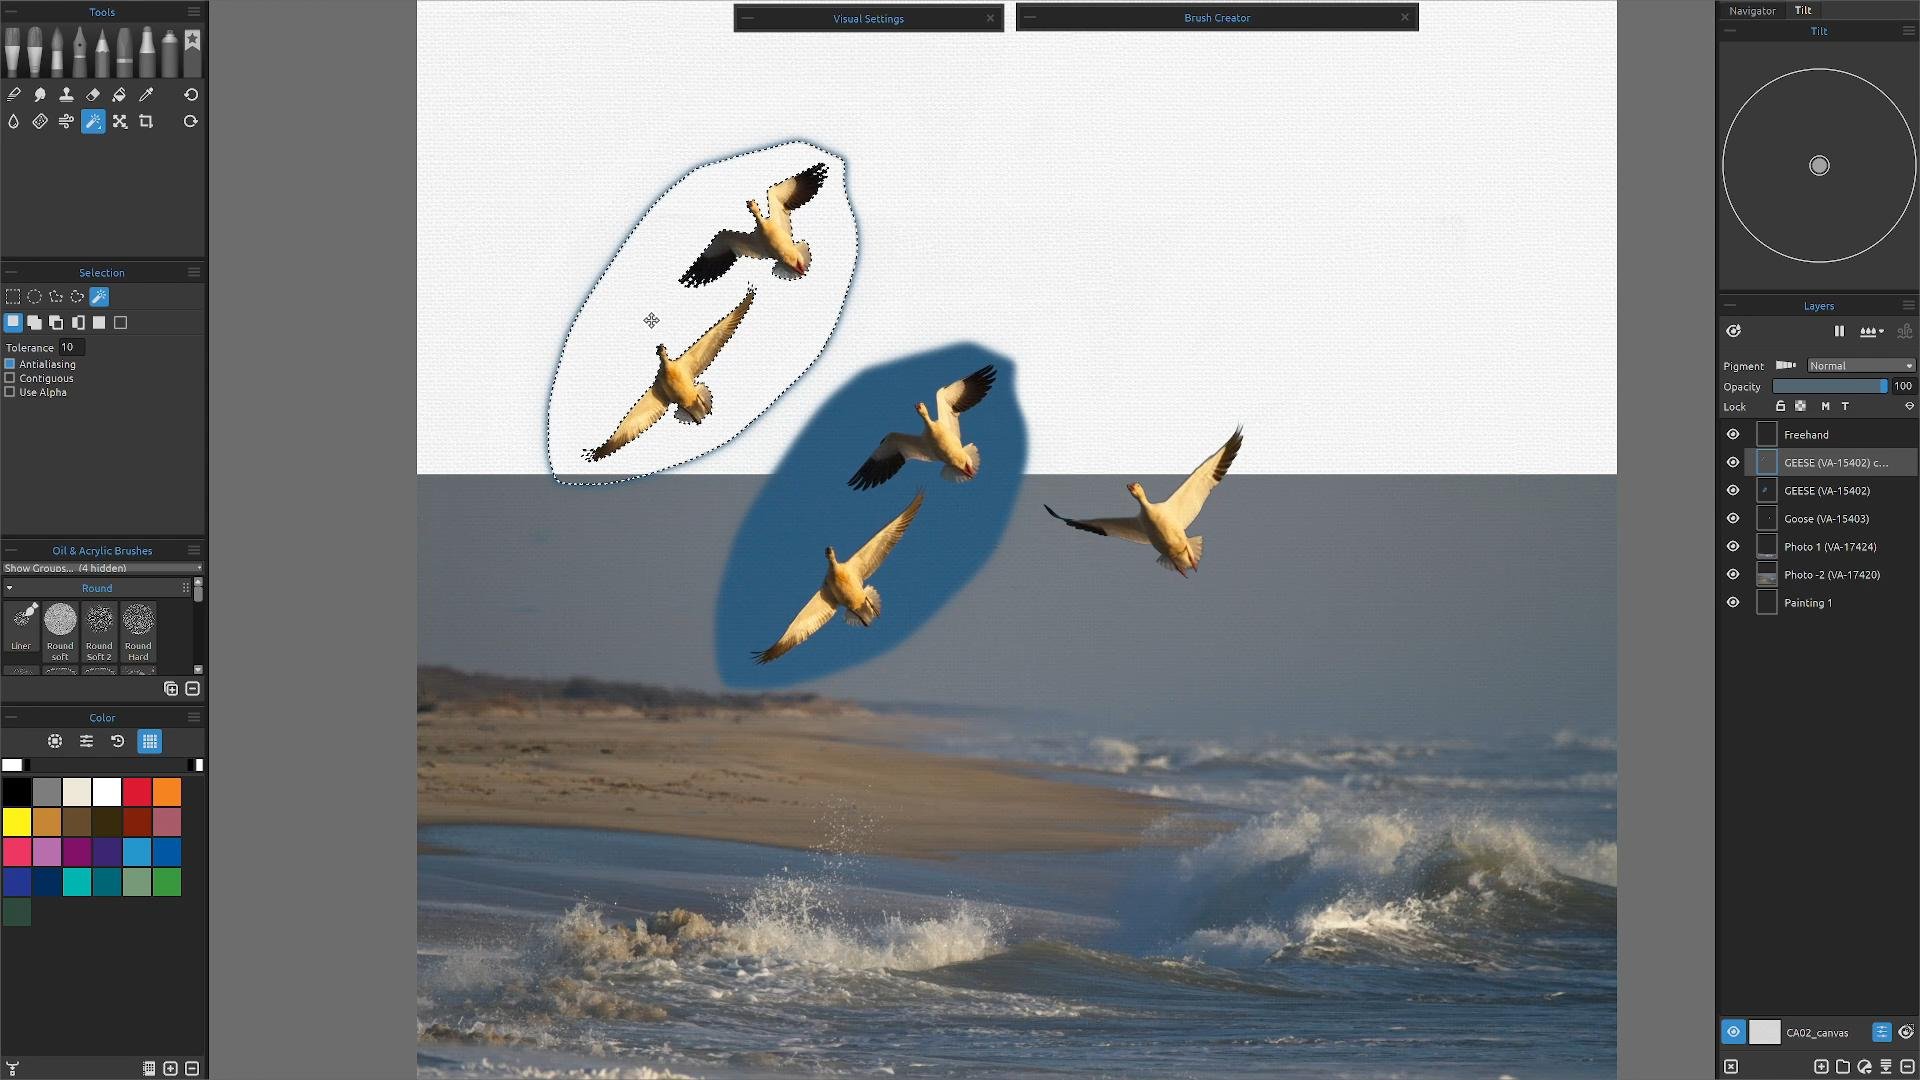 Tip: If combining multiple photographs to one reference, always make sure the light is coming strong from the same side in all images. If this is not the case, you can use a Transform tool to flip horizontally images that are producing opposite light.
Set for Tracing
Once satisfied with the layout of the reference, we can slowly get to painting. For this tutorial, we are using only default Rebelle brushes. Before we set the tracing layer, it is important to understand how tracing in Rebelle works: the color is applied for each stroke. It means that each brush stroke picks the color pigment from the first "click" and uses it until you do another click. Rebelle does not trace all colors from a reference tracing layer during a single stroke.
First, we need to go to Edit > Preferences and in the Color section, you will set the Tracing Color Sample Size. You could have 1 pixel, 3x3 pixel square, or a 5x5 pixel square block of where you're going to pull your colors from your photograph. I'm working on a 300 DPI which is pretty tightly packed with pixels so I'm going to go with the 5 x 5 and then that is how many, a total of 25 pixels, I will be pulling my color from anywhere I touch down with my brush on the photograph. Now, remember no matter how big your brush is you're only going to be pulling out colors from the very center of the brush while color tracing.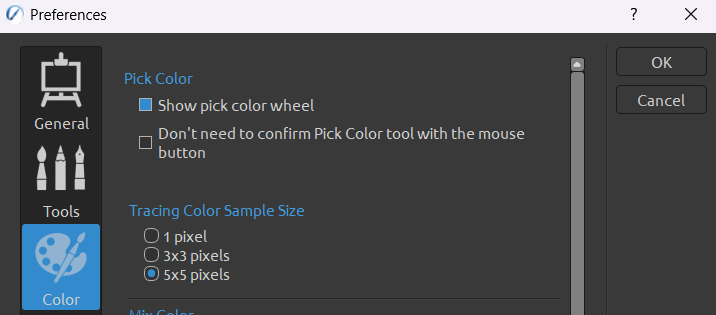
A thing to remember is that you can have only one tracing layer at a time, which influences all other layers on the same level. If you do not want the tracing layer to influence all layers, create a group of tracing layer and those layers that should be influenced. The tracing layer is locked by default to protect it from unwanted changes. You can unlock the layer by clicking the “lock” button in the Layers panel.
Tracing vs. Influenced Layer
There are just a few simple steps to tracing in Rebelle. We already covered step one, which is setting up the image layer you want to trace colors from. Now is the time to turn it into a tracing layer. You can do so by selecting the layer and clicking on Menu > Layer > Tracing Layer or by clicking on “T” icon in the Layer panel. If the letter “T” appears on the layer, this layer is now set as a reference tracing layer.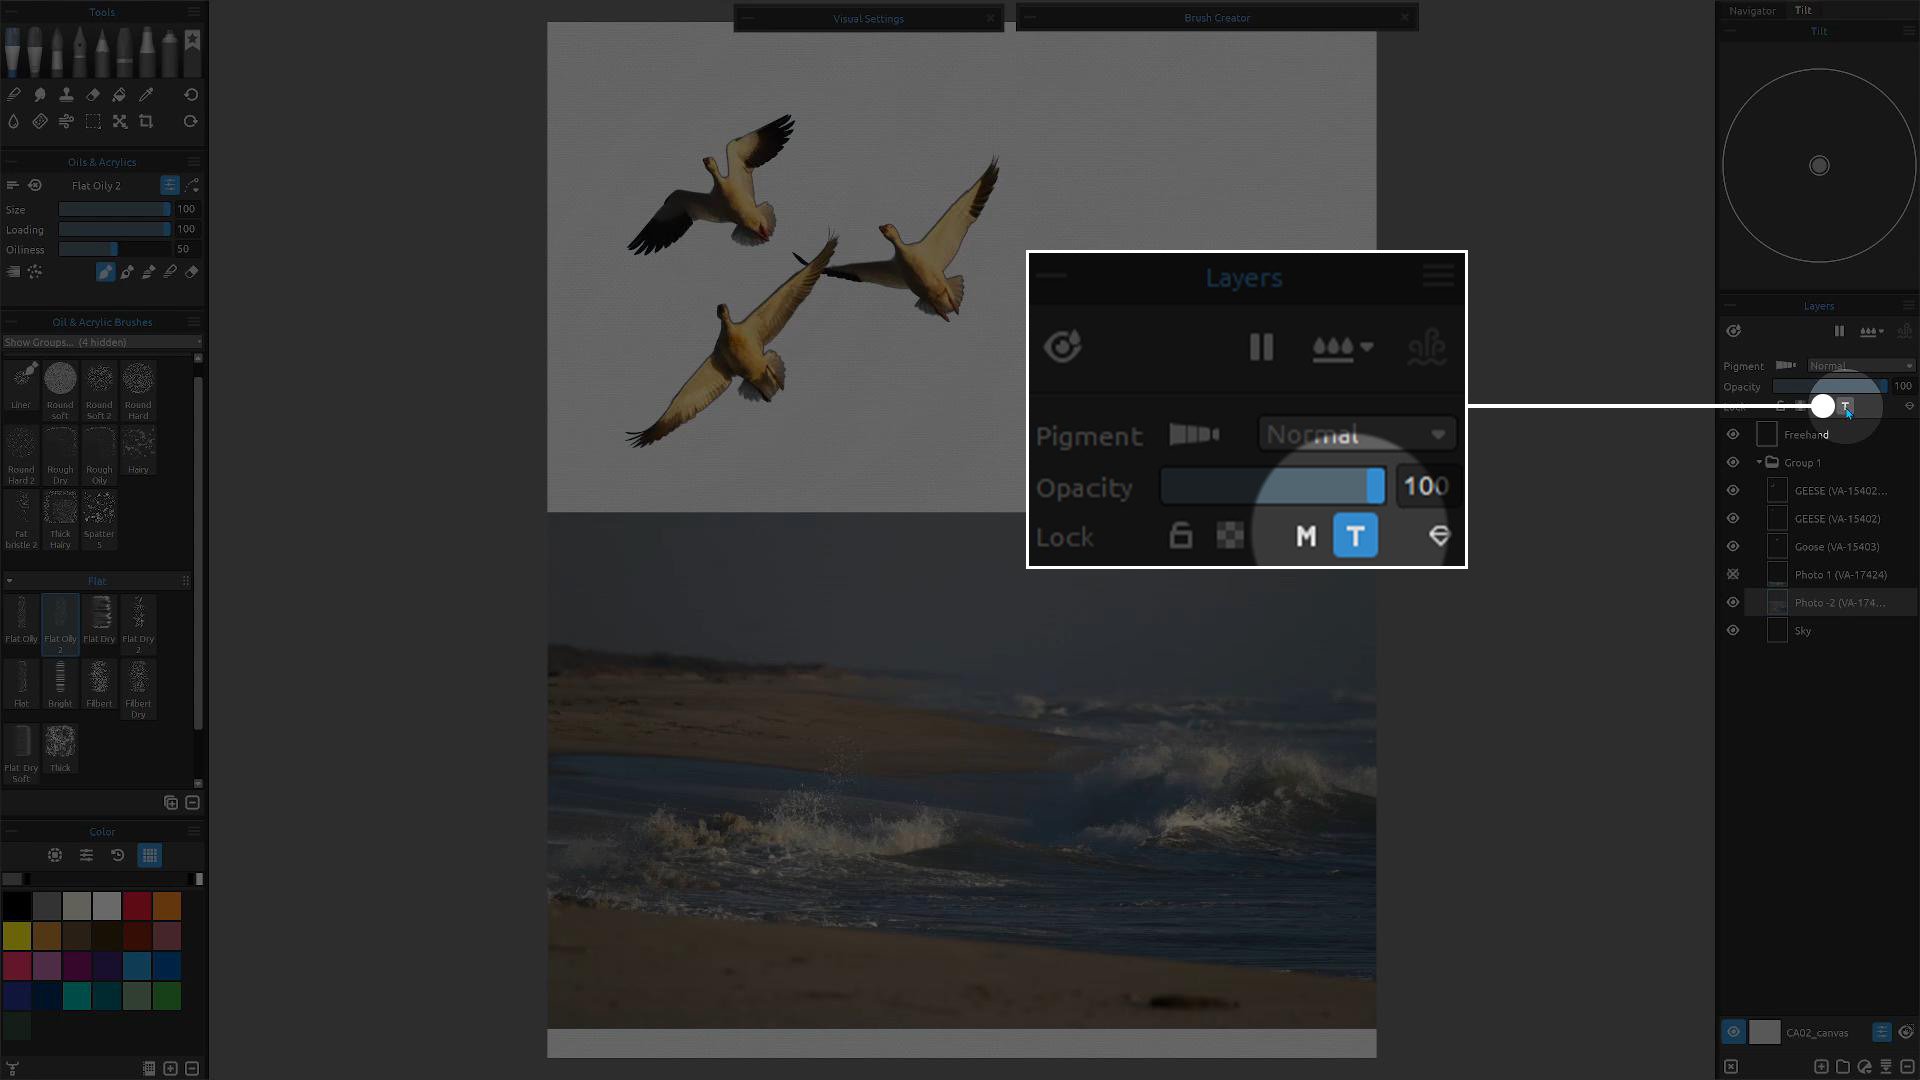 The next step is to create a new layer you will paint on. Or you can choose any layer you already created, as the “T” now influences all layers.
Once you are done with tracing, click on the “T” icon again and it will turn off the tracing.
Color Tracing in Practice
My training from the Art Institute of Pittsburgh way back in the early 80’s was in Oil and Acrylic Painting. We worked from the background to the foreground. So, we will start with the background and then overlay or overlap everything on top of that just to keep our nice straight lines clean.
As your tracing layer overlays with the layer you are painting on, I recommend taking the opacity of the photograph layer down, to 40 in this case, so we can actually see what we're painting. Do not worry, we will still be grabbing 100% of the color even though it is down to 40% of opacity.
As it is better to see something once than to hear, or in this case read about it a thousand times, I am providing you with a detailed video tutorial on how to create this painting while tracing colors from my reference photographs. Feel free to import any image to Rebelle and practice while listening to the instructions.
Watch this tutorial on YouTube: youtube.com/watch?v=1J-0le-YIuU
I hope this tutorial was helpful and inspirational. Whether you painted ocean waves like I did, or chose a different topic, the principle is the same. To finish this tutorial, I want to provide you with a few easy ways how to pick colors from references when you do not want to use tracing.
Pick Colors from the Reference
If you wish to work on your painting freehand just by looking at a reference image on a side and picking colors from it, you can click on the eye dropper in the Reference Image panel. You can then easily pick out any color you want and when you move over the canvas, your brush will paint with the color you just picked. If you move back to Reference Image, the color picker activates again. This is a really quick and efficient way how to pick colors without tracing.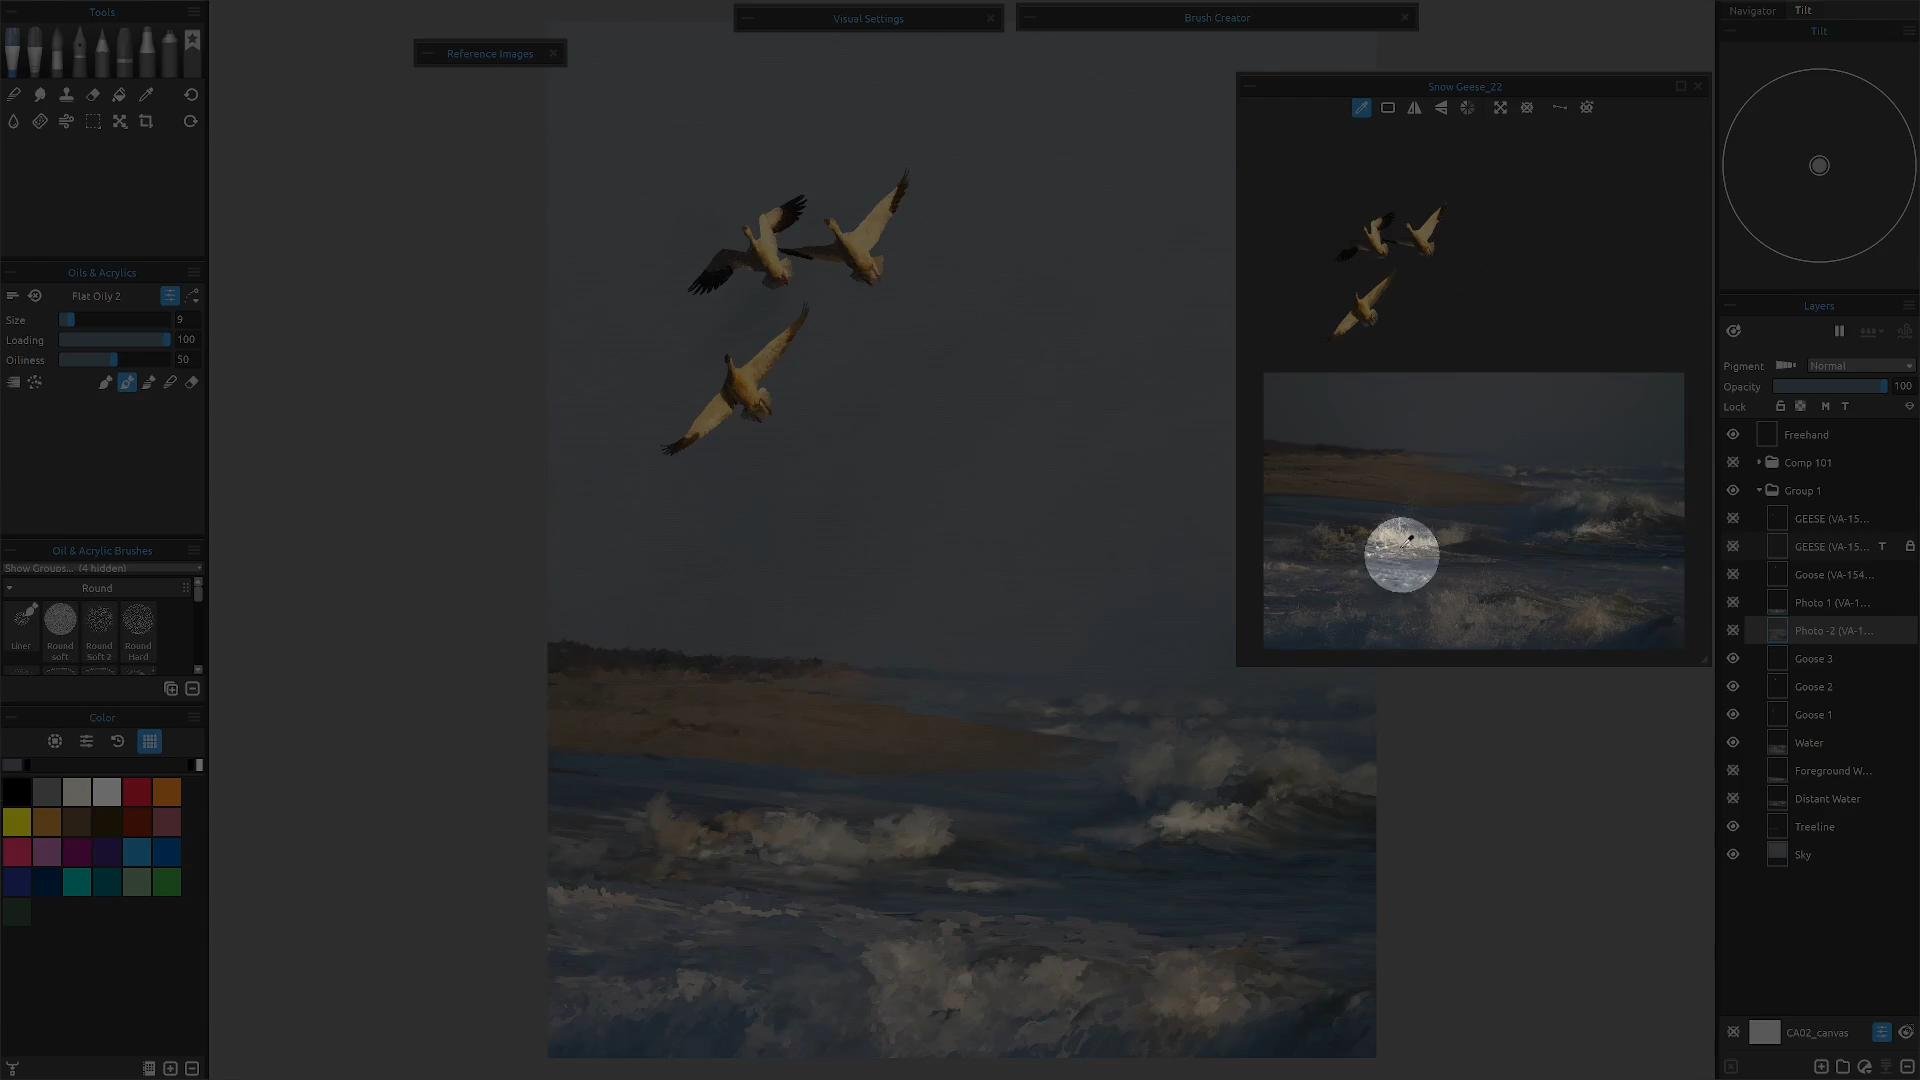
Create a Color Set from Reference
What you can also do, is bring the same reference photograph and create a color set from it. Just click on the hamburger menu in the Color Set panel and then Color Set > Create Color Set From > Image File. You can now choose whether you want 4, 9, 16, 25, or even 36 colors. I decided that 25 would be enough colors to choose from in my case. But the choice is yours.
 If you want, feel free to use this color set to practice the ocean waves of my reference. You can just drag and drop the PNG image from above directly into Rebelle's Color Set panel or download it and import the image to the Color Set library. Rebelle's website also offers a great collection of Color Sets created by other users. These assets are free at your disposal.
We believe Tom has covered the tracing topic well in the video while accompanying it with additional tips on how to work with light, layers, colors, and reference images in Rebelle. If you find this tutorial helpful, leave a comment below or under the video on YouTube. We look forward to hearing your feedback and seeing your next work.
Happy Tracing,
Escape Motions Team
---
Learn more about Tom Gallovich: tomgallovich.com
Find more rebelle tutorials from Tom Gallovich on this link.
What do you think?
0 Responses
0
Upvote
0
Funny
0
Love
0
Surprised
0
Angry
0
Sad
Sign in to comment!
Be the first to comment.