
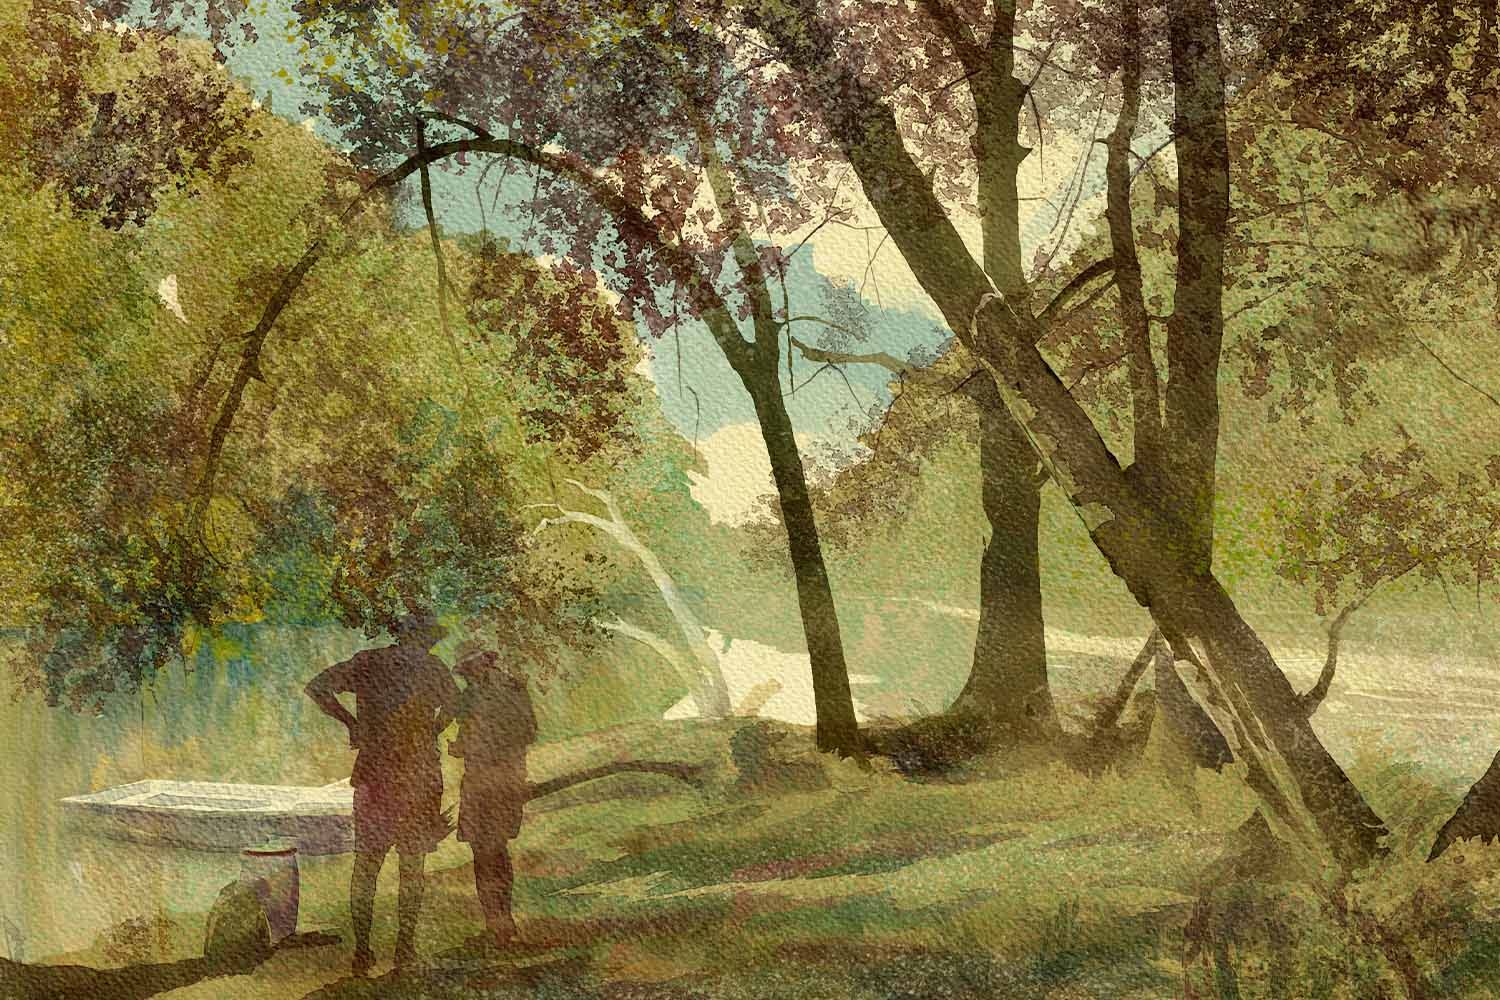

Lubomir Zabadal, an art educator comes with tips and tricks for watercolor painting in Rebelle. In this blog, he examines the creation methodology of watercolor artworks. Dive in to explore the digital possibilities of this fascinating medium and get tips on how to make realistic-looking artworks using digital painting software.
When it comes to digital watercolor, it has its own esthetics and a unique effect. We could talk about digital painting, however, that could be anything from saving pixels in pixel art to a perfect virtual simulation of sci-fi worlds. Rebelle 4.1 digital watercolors are one of these possibilities. Here, the main aim is to come as close as possible to the effect of real watercolors. To achieve that, creators examine real watercolors, not other digital painting tools. If you wish to improve your digital watercolors, you should examine the work of traditional watercolorists as well. Surely, painters like Joseph Zbukvic, Alvaro Castagnet, Herman Pekel, Chien Chung Wei can be of great inspiration. Or you can examine the work of masters of the past, such as J.M.W. Turner was. Let’s take a look at the watercolor painting process together!
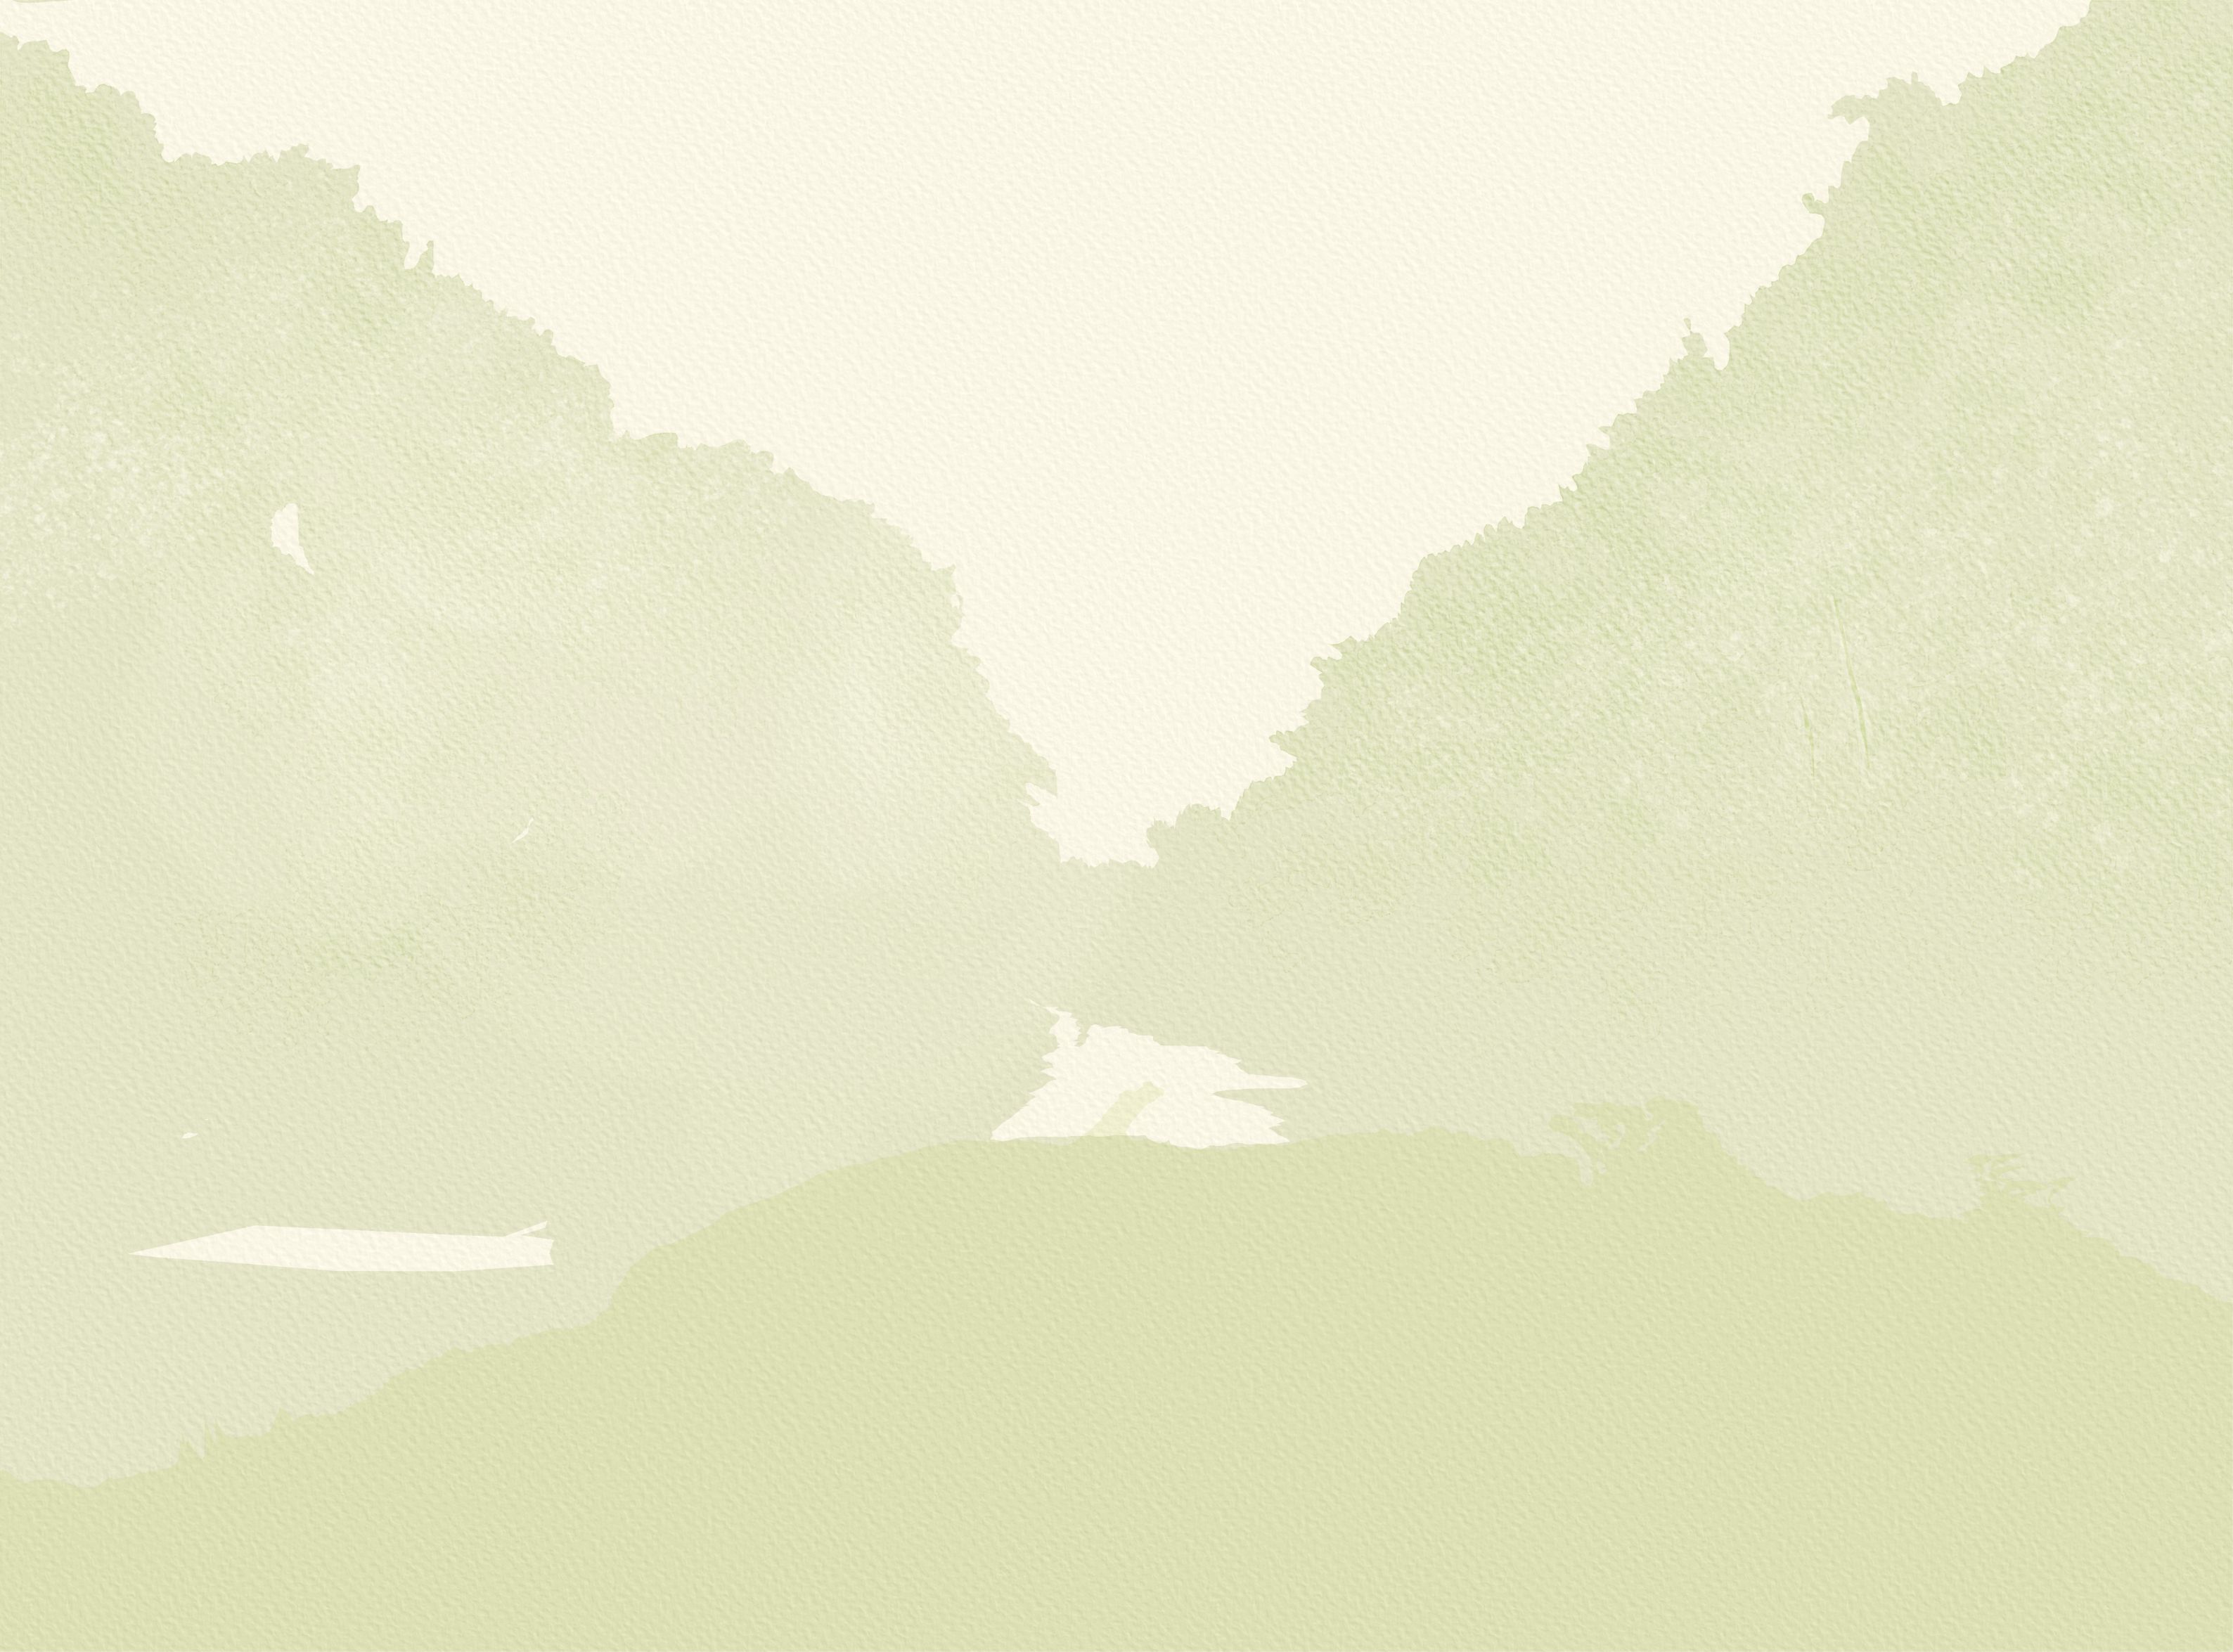
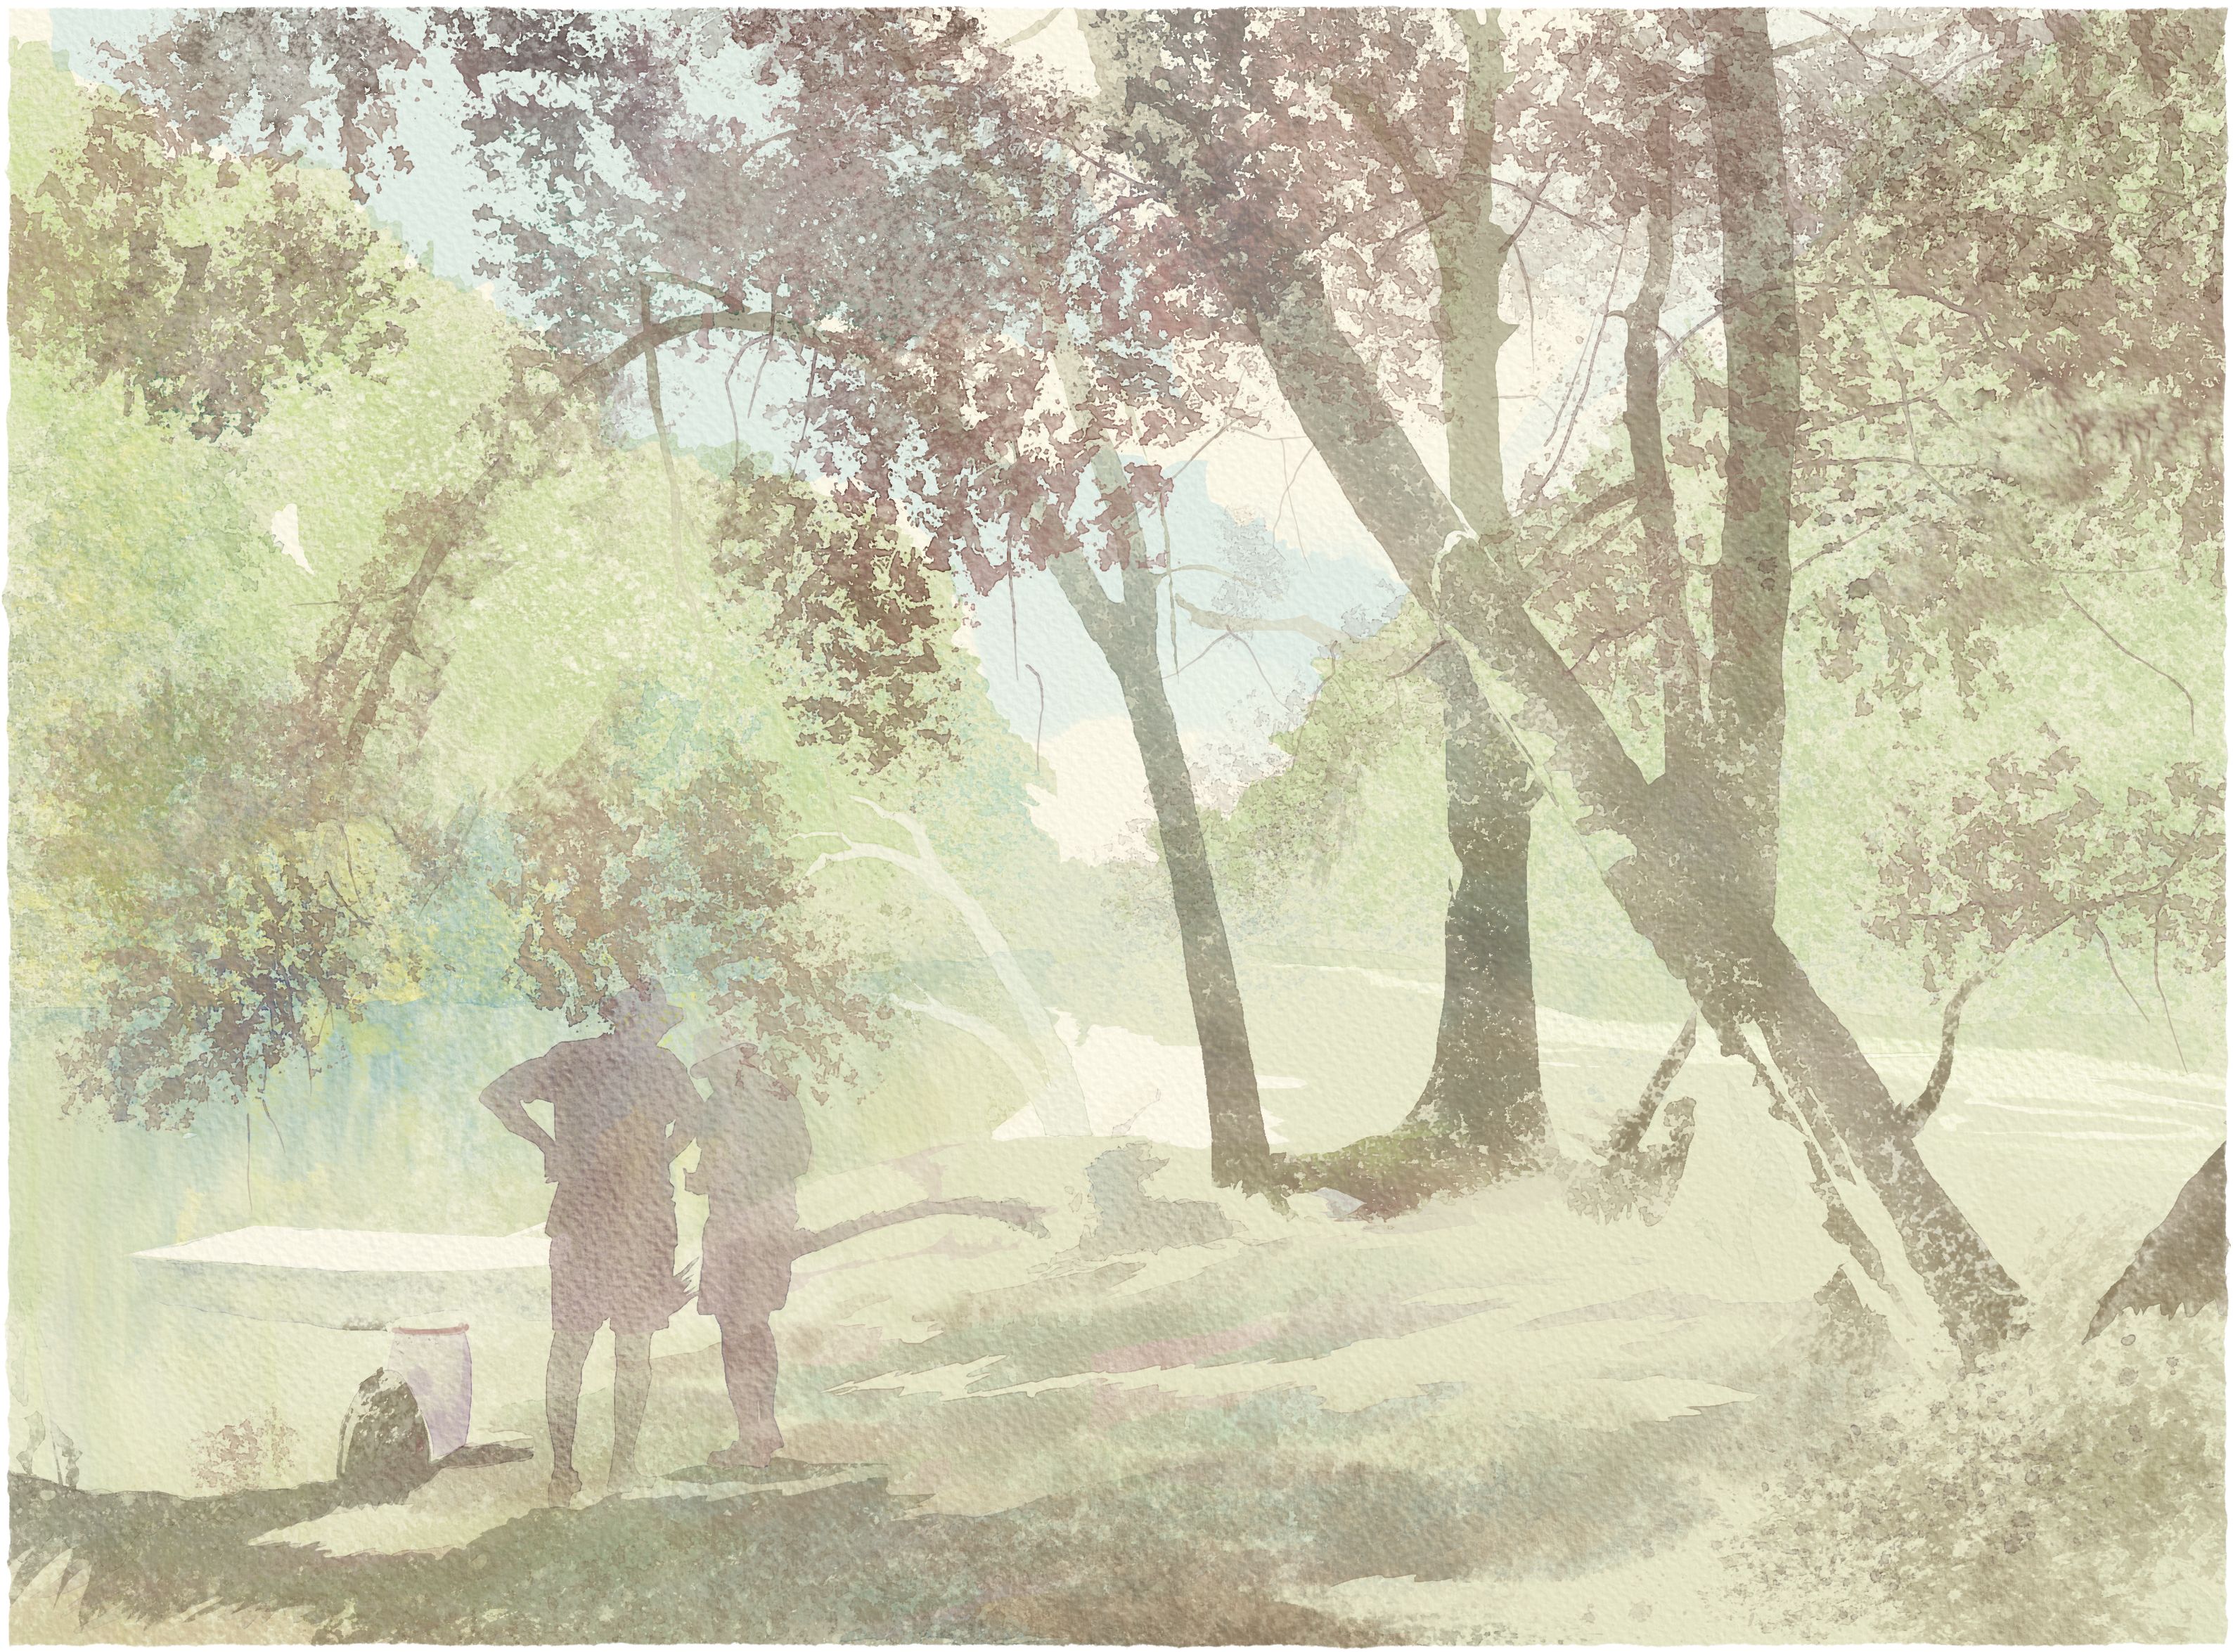
Step 1: Underpainting of big surfaces and little empty spots
The watercolor painting process most commonly starts with soft and light underpainting. In Rebelle, I recommend choosing a bigger brush with approximately 20% "Opacity" and 30 – 40% of "Water". As masters warn, be careful with using darker colors in this initial stage. Let’s say, if you would paint the sky too dark at the beginning, you would lose a lot of freshness and contrast in your watercolors. The underpainting determines the colors of the artwork and should be painted in bigger forms. However, these forms should not cover the whole surface. Uncovered spots create reflections and wonderfully add to the expressivity of the painting. It is quite difficult to create underpainting in big forms and skip the right spots at the same time. Watercolor artists often use a little helper called masking fluid, which removes the spots after drying.
If you are unable to let the right spots uncovered while painting in Rebelle, create a masking layer and paint reflecting spots using a brush with 100% opacity. Another possibility is to use a big brush and softly cover the paper so the spots that should not be painted stay that way. It will create interesting light glitter in the painting. In Rebelle, you will need a brush with "Texture Strength" and "Texture Contrast" set to 90-100%. You can adjust these settings in the Brush Creator.
Tip 1: Paint light spaces, leave empty those spots where sharp light and reflecting should be.
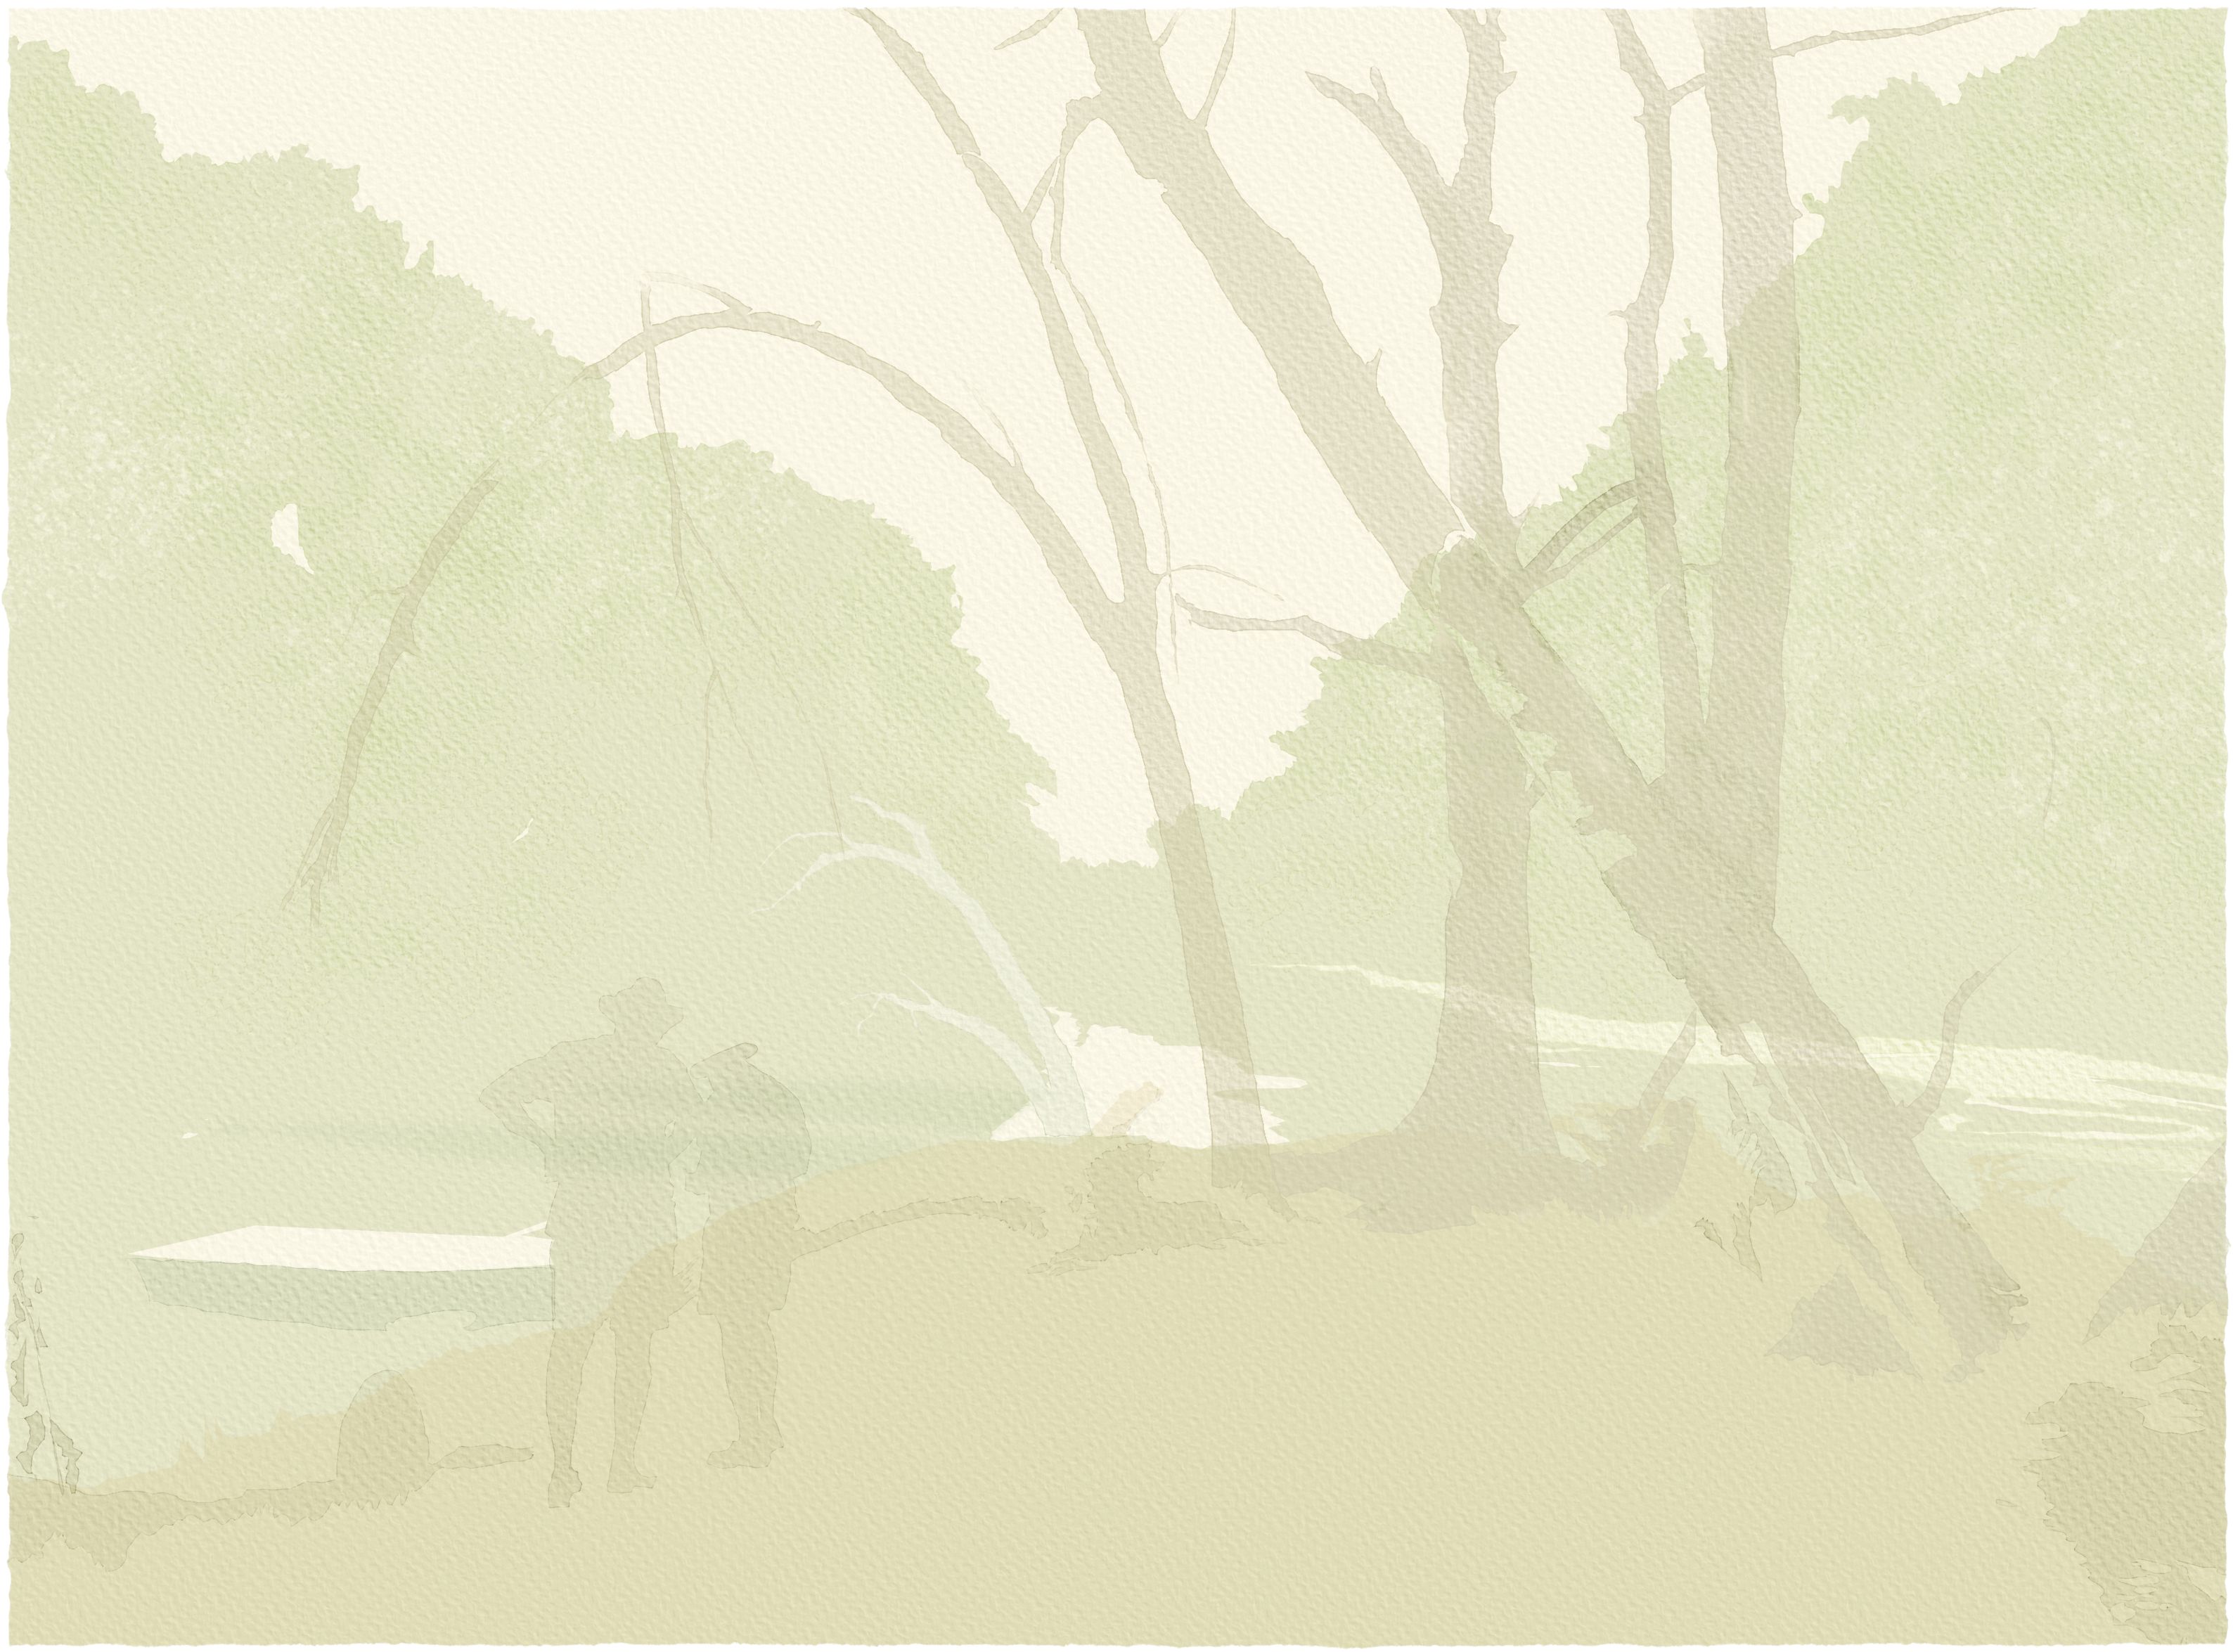
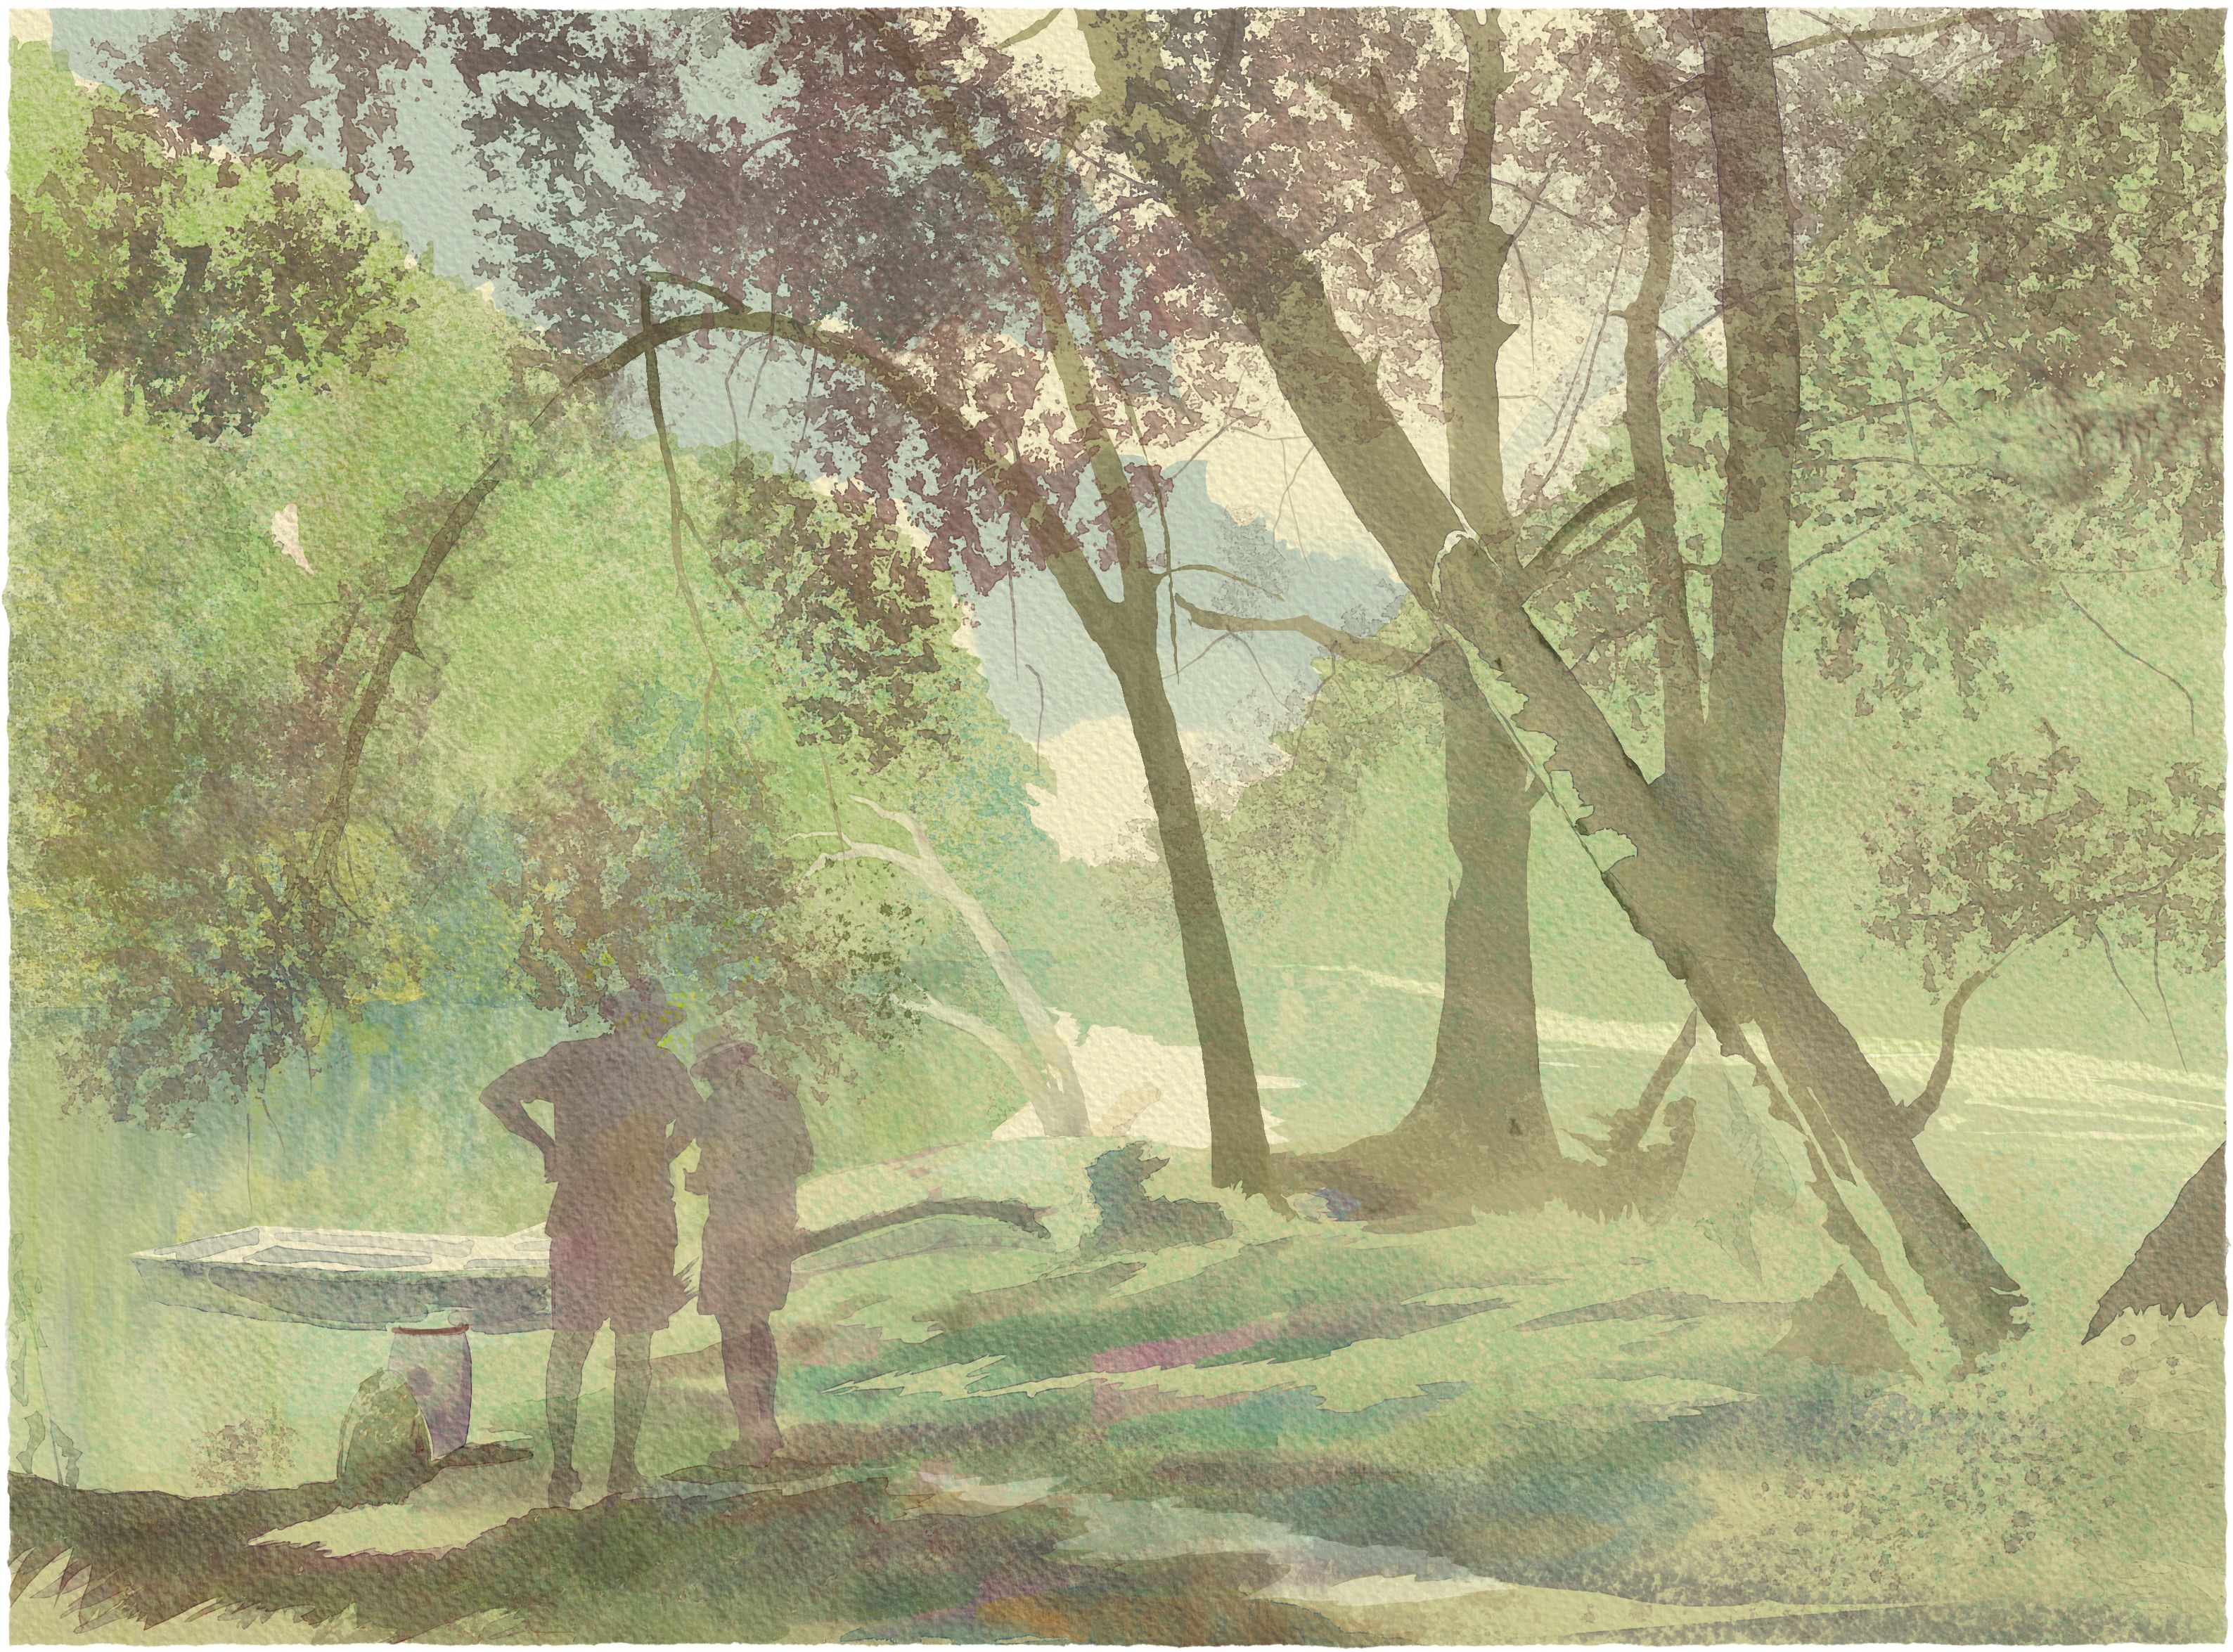
Step 2: Creation of main silhouettes
The next step is to create the main silhouettes of your painting. You need to decide if their shapes will be blurry or sharp. Masters likely choose the combination of both in one silhouette. Sometimes they start with sharp edges in the upper part and continue with blurry edges at the bottom. This is very typical if the objects are situated in rainy weather or near the water. In opposite cases, they switch the order and start with blurry objects at the top and sharp edges at the bottom. These are examples of paintings with blurry horizons of mountains or trees in the background.
The edges painted with a dry brush can be also considered blurry. The degree of edge sharpness is an important means of expression in watercolors. It could be said, that the precise lightness of spaces and sharpness of edges make the watercolor paintings. Equally important is the combination of positive and negative shapes. You can achieve that by inserting darker silhouettes in light areas and omitting light silhouettes in darker areas.
Tip 2: Paint silhouettes with different sharpness of edges. There can be a variation of edges within one silhouette.
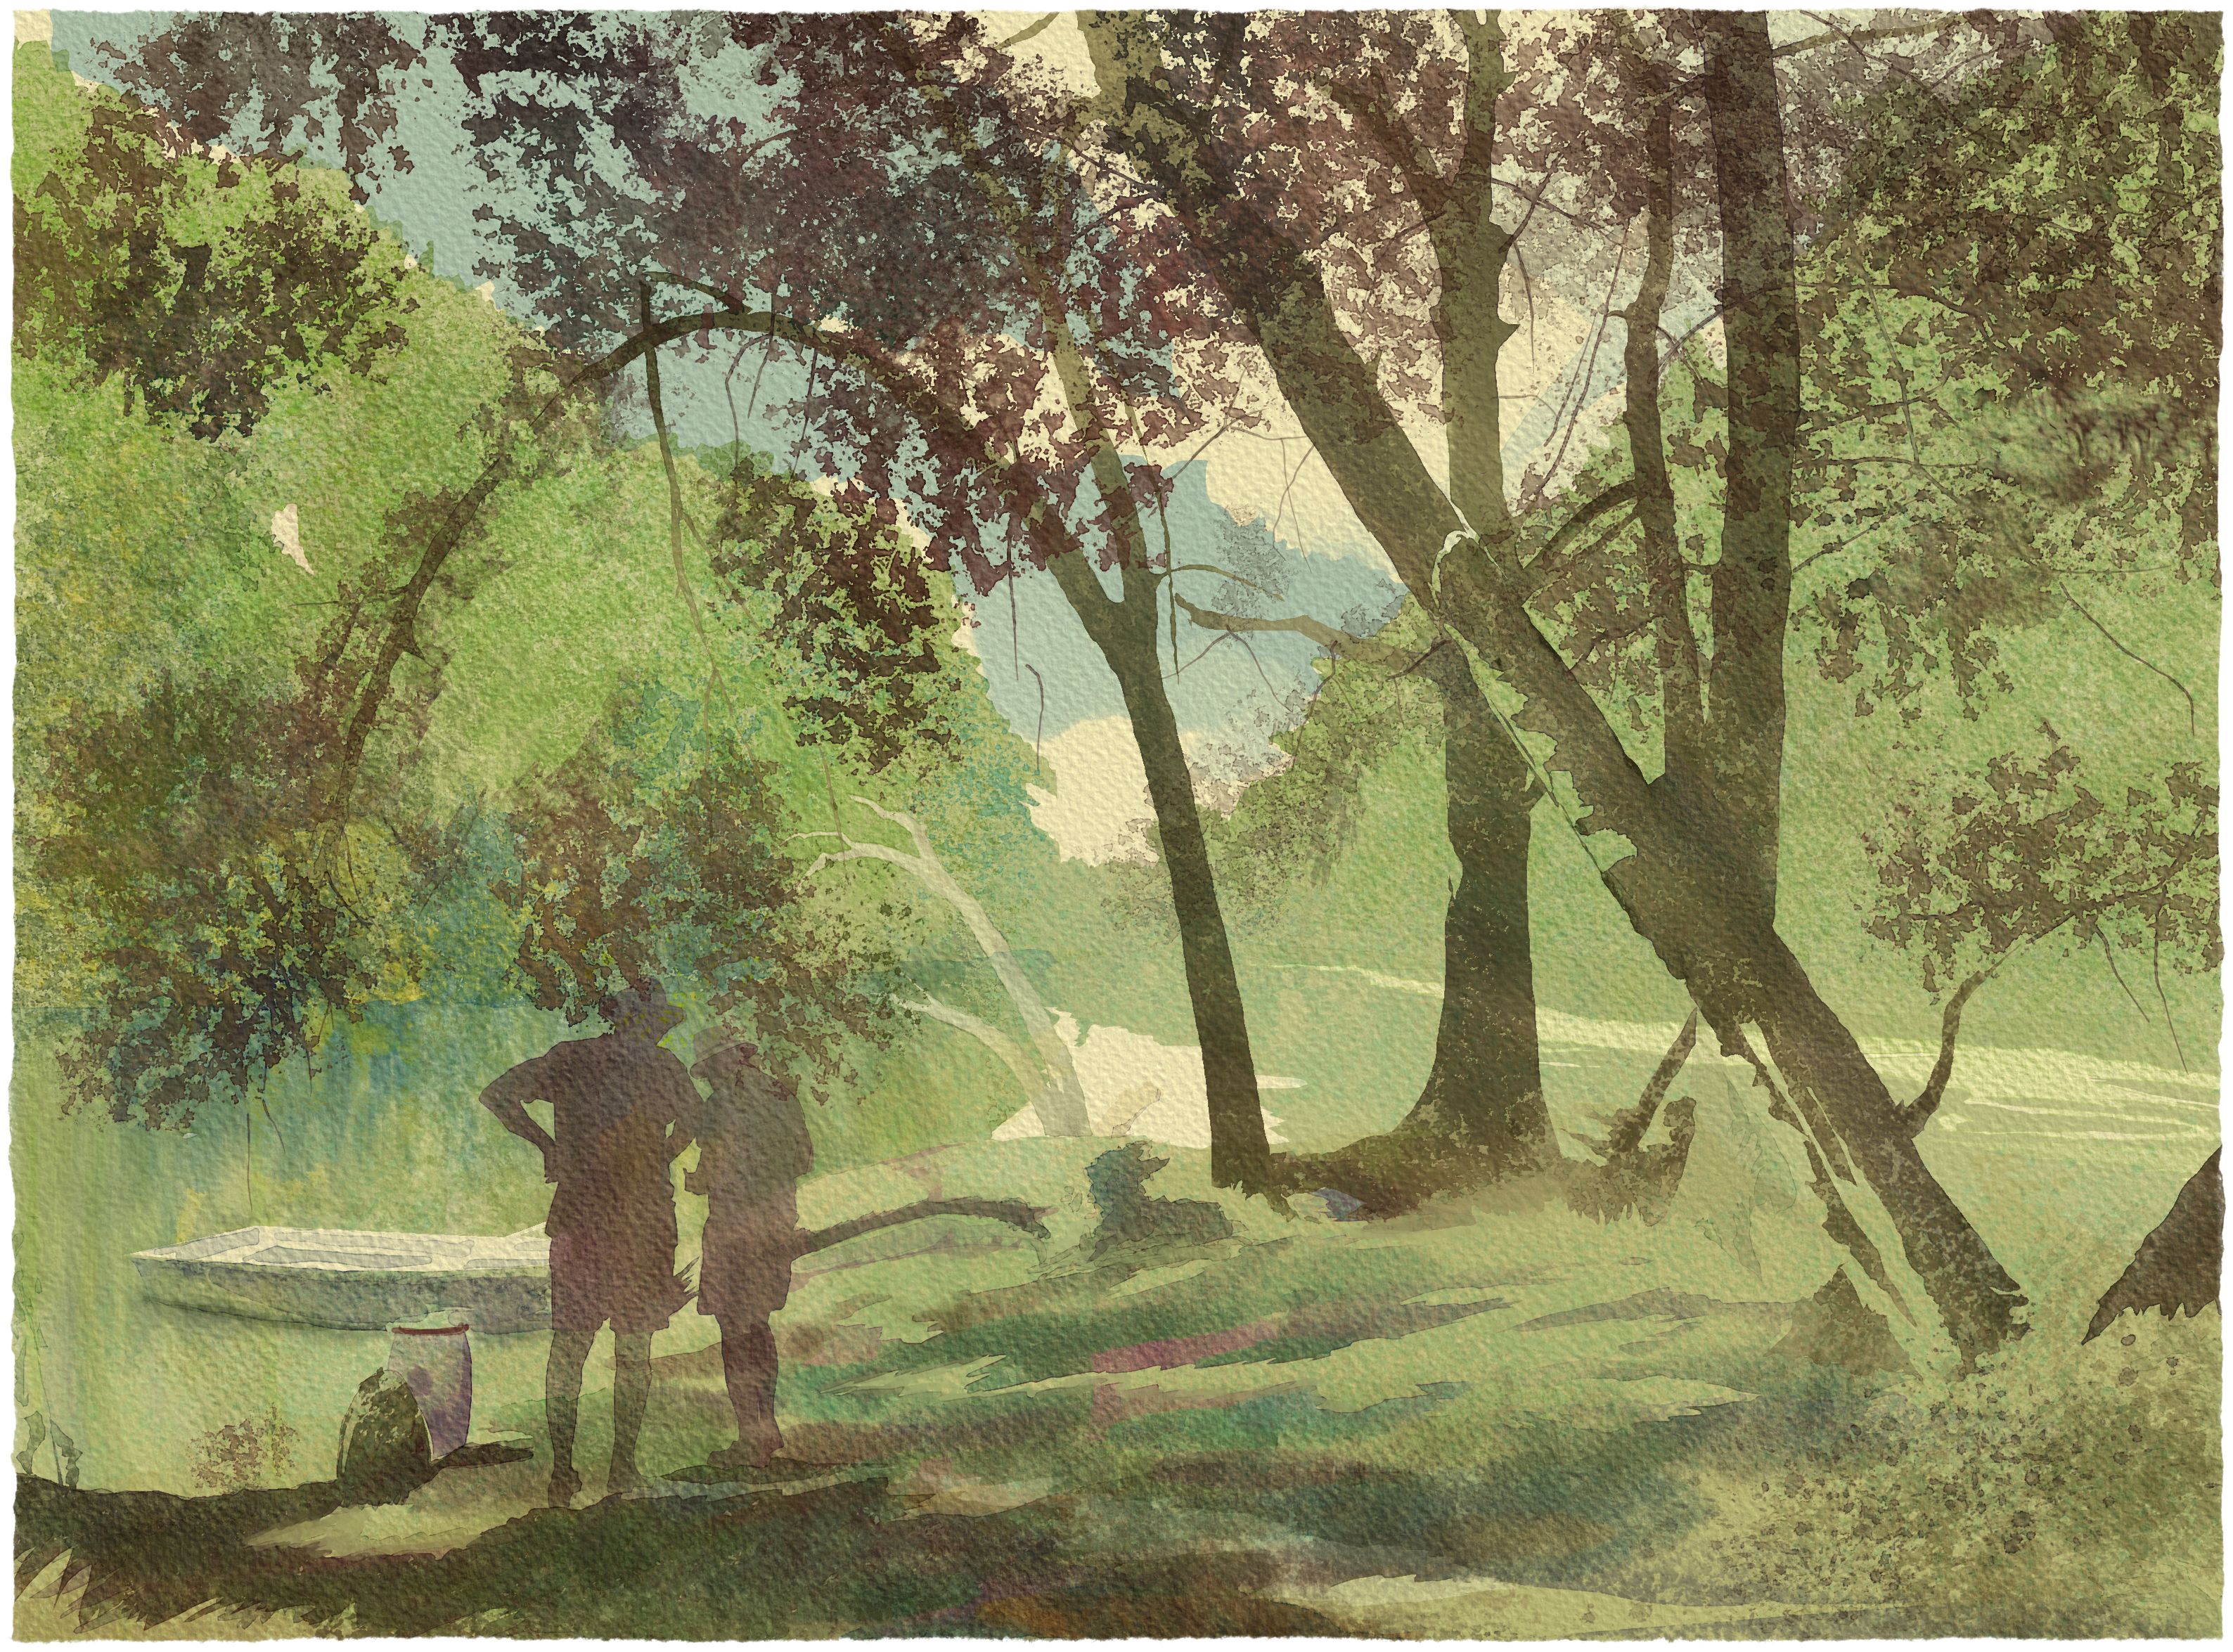
Step 3: Creation of smaller shapes within the silhouettes
Having a silhouette with perfect edges is not everything. It is very typical for watercolors, that there is something going on within the silhouette. And that brings us to the real watercolor adventure. The paint is bleeding, dripping, and granulating. Smaller shapes inside the silhouettes should not clash with these processes. They need to be a natural part of the silhouette. Most masters try not to be too descriptive and commonly use a dry brush to finish dry spaces. Otherwise, they mostly work with a slightly wet surface. In Rebelle, this means working with either a wet layer or a maximum of 15% of "Water" in the brush. In this case, the form is easy to read and the paint does not bleed too much. On the contrary, if you want your colors to bleed to undefined spaces you need to wet the layer more or increase the "Water" in the brush to 30%.
Tip 3: Do not paint too specific shapes, rather work with a dry brush on a dry surface or a slightly wet brush on a wet layer.
Step 4: Gradual addition of darker areas
Traditional watercolor painters gradually darken the painting. Some do it linearly by painting one spot at a time to an almost final version and move on to the next part. They combine all steps before moving: wet the paper, paint the basic shapes, skip the white spaces, blur some edges, and then add darker stains to the wet layer. They are experienced and know how to estimate the right lightness of color and the wetness of the spot. Others work gradually with the whole surface. At first, they under-paint, then make silhouettes, etc.
With Rebelle, you can try either approach. For better control of dry and wet spots, it is convenient to work with multiple layers. If you use just one, you can effectively darken some areas when you lock the transparency of the layer after painting the silhouettes ("Lock Transparency" button in Layers Panel) and add additional colors and textures. At first, you can paint something into a separate wet or dry layer and then gradually add paint over the same area using different colors with the same or higher opacity. You can embed darker colors into the wet layer or use splatters to add texture.
Tip 4: Lock transparency of the layer and experiment with colors and textures.
Step 5: Corrections
There is no need to underline the advantages of the "Undo" option. Some digital artists are trying to limit the use of "Undo" to come as close as possible to the traditional watercolor process. In Rebelle, there are several options for corrections when it comes to watercolors. The silhouette’s edges can be blurred with the use of "Blend" paint mode. It is better to use it before the painting dries because the blending of the dry layer brings a different look than the initial blending. If needed, correct the edges by adding water to the spots, using the "Water" tool. The paint can be removed with the brush "Erase" mode. You can increase the opacity by duplicating the layer or use one of the blending modes, such as "Multiply" or "Linear Burn". The composition and canvas size can be also adjusted later. Simply said, in the digital world, there is a great space for corrections.
Tip 5: Adjust the "Water" tool to different amounts and duplicate the layers to gain natural highlighting of the whole watercolor painting.
Step 6: Details
Esthetically pleasing details are a sign of a high-quality watercolor painting. They can be created in different ways. You can leave the small empty spots by softly scratching the dry brush on the paper. Another way is to use a tiny brush or add ink to your watercolor. The strong contrast between the large shapes and the small detail adds to the persuasiveness of the artwork. Masters of traditional watercolors sometimes scratch to the almost dry surfaces using metal objects to achieve perfect contrast.
In Rebelle, you can use either pen or brush in the "Erase" mode. With 100% "Opacity" of this tool, you will get a chance to create reflexes, white edges of different objects in contrast to light, and so on. These will appear similar to using white paint in real watercolor. The details can be added using splashing or textured brushes in painting or erasing mode.
Tip 6: Paint shape with size in tens of %, details with the size of 0-9%.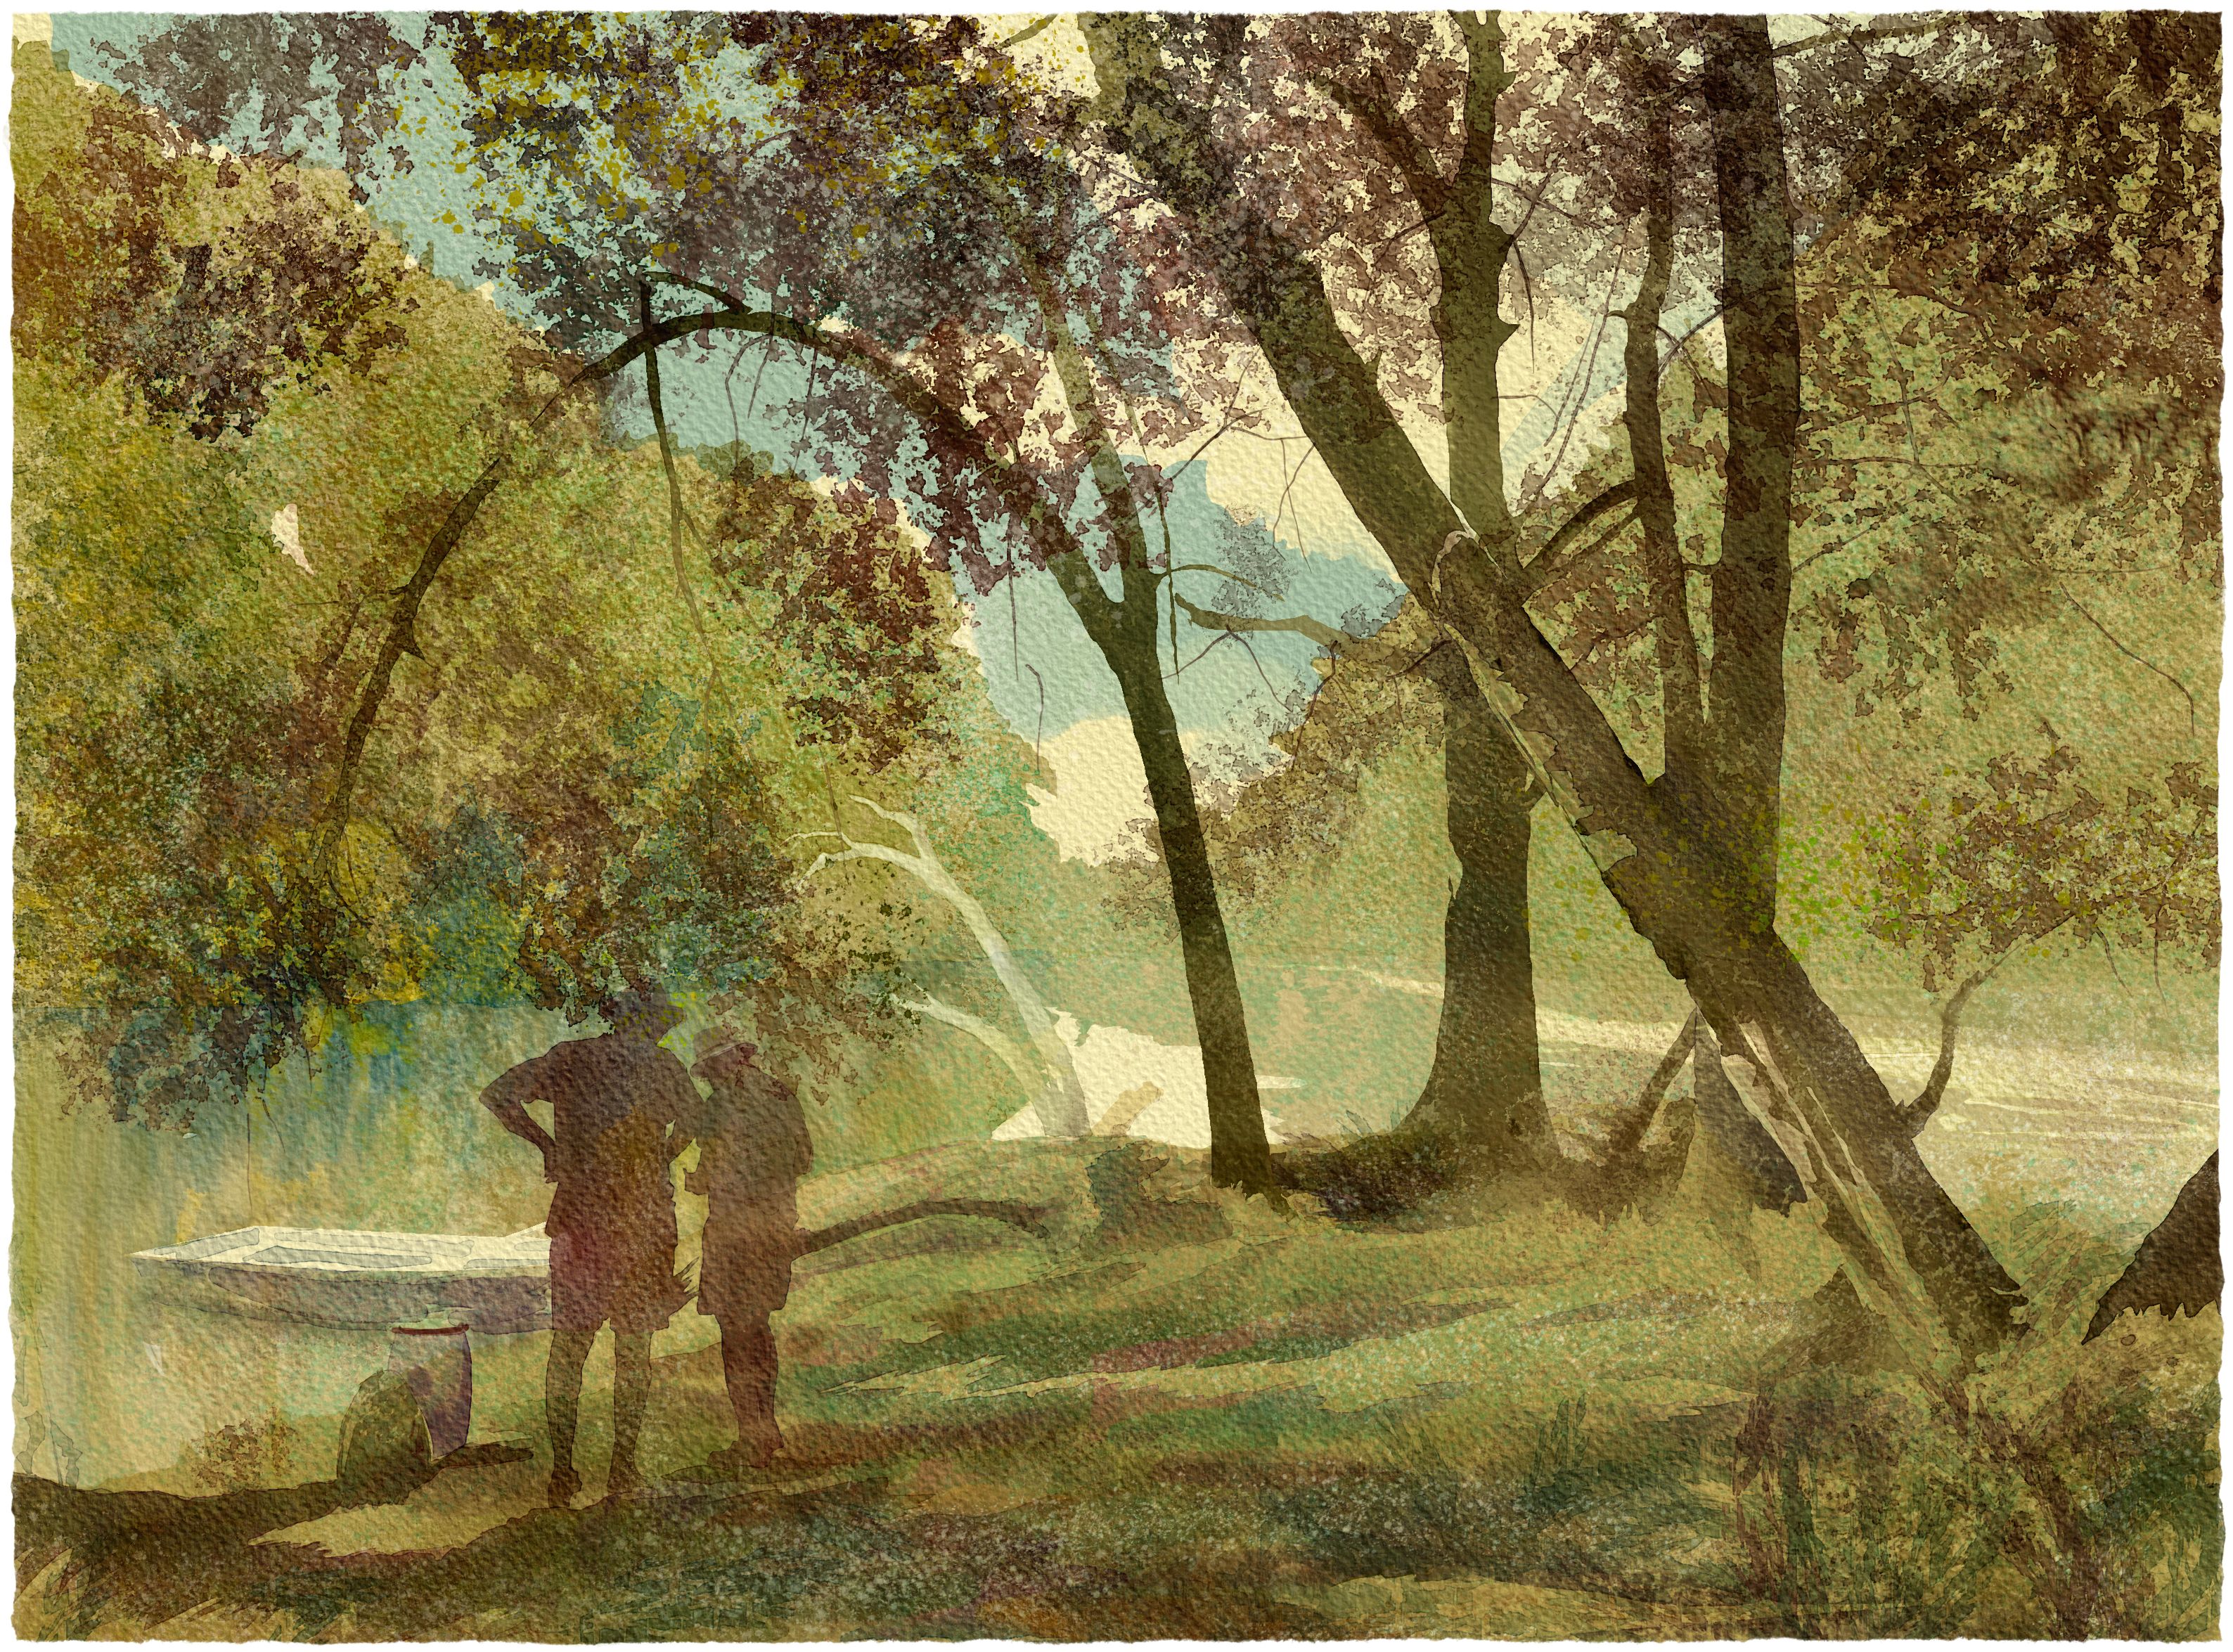
We hope you enjoyed Lubomir Zabadal’s watercolor tips and tricks. In the next blog from Lubomir, we will take a look at special techniques, such as the direction of paint drips for the creation of shapes and textures, pausing and stopping the simulation, overlaying color corrections, and more.
Happy Painting!
---------------------
The author of the blog post is Mgr. Ľubomír ZABADAL, PhD. - an expert for traditional art media and assistant professor at the Department Of Creative Arts and Art Education at UKF University, Slovakia.
What do you think?
0 Responses
0
Upvote
0
Funny
0
Love
0
Surprised
0
Angry
0
Sad
Sign in to comment!
Be the first to comment.