
Painting realistic fur and feathers can seem intimidating. Animals have an enormous variety of textures, from stripes and spots to fluffy coats and specialized feathers, and it can be difficult to know where to begin. In this tutorial, Featured Artist Ryanne Levin provides tips on approaching fur and feather paintings, including brush recommendations in Rebelle.
Watch on YouTube: youtu.be/j4sqqlVKdmU
Rather than trying to copy every individual hair or feather from a reference, start by breaking the texture down into a few essential elements: pattern, direction, and value. Understanding these three elements will give a much stronger foundation and make the actual painting process feel far less overwhelming.
Study the Pattern First
_normal.jpg) The first thing to look for in a reference is the pattern. Think about the shapes that repeat throughout the fur or feathers. Instead of seeing hundreds of individual hair, try to identify the larger shapes they form.
The first thing to look for in a reference is the pattern. Think about the shapes that repeat throughout the fur or feathers. Instead of seeing hundreds of individual hair, try to identify the larger shapes they form.
For example, in a close-up of polar bear fur, the main shapes can look like tapered, leaf-like forms. Most of the shapes are similar in size, but there are occasional smaller or larger sections that keep the pattern from looking too uniform. Different areas of the same animal can also have noticeably different patterns. One section may contain shorter, rounder shapes, while another may have longer, tighter shapes.
Pay attention to how these shapes are arranged. They may form horizontal or vertical rows, overlap one another, or become slightly offset. Looking for these larger configurations is much more useful than trying to reproduce every individual strand immediately. Once you understand the major pattern, zoom in and look for smaller textures within those shapes. Fur edges, for instance, are rarely perfectly smooth. They may have messy, stringy details that break up the larger forms. These smaller irregularities are useful when deciding which brush to use and how to finish the edges of your texture.
Breaking a reference into large shapes and small details also gives you more freedom. Once you understand what you are looking at, you no longer have to work so directly from the reference. You can use your understanding of the texture to recreate it more naturally.
Follow the Direction of the Fur and Feathers
_normal.jpg) After identifying the pattern, study its direction. Fur and feathers do not simply point in one consistent direction across an animal. They follow the underlying form and change direction as they move around the body.
After identifying the pattern, study its direction. Fur and feathers do not simply point in one consistent direction across an animal. They follow the underlying form and change direction as they move around the body.
In the polar bear example, most of the fur has a gentle diagonal slope toward the right and downward. As the fur approaches the upper and left portions of the form, however, its direction changes more noticeably because the fur is beginning to wrap around the edge of the form. This is an important principle to remember: texture should describe the form underneath it. If every hair points in the same direction, the surface can look flat even if the individual hair are beautifully painted. Following the changing direction of the form helps the viewer understand its volume.
The same idea applies to feathers. Look at where the feathers begin, which direction they grow, how they overlap, and how their direction changes around the animal's body.
Use Value to Create Dimension


The third element to consider is value, meaning how light or dark a color is. Value is particularly important when painting animal textures because it helps create the illusion of dimension. The correct values make it easier for the viewer to see how fur or feathers wrap around a form and give the surface a sense of volume.
You do not necessarily need to reproduce the exact colors from your reference to achieve this effect. You can use very different hues and still create convincing dimension as long as the relative light and dark values are appropriate. A useful approach is to choose several values before you begin. Start with a dark value for the deepest crevices, then select a midtone, a lighter midtone, and finally a light highlight. The exact hue can be changed creatively while keeping these value relationships intact.
In Rebelle, you can also check your values by pressing “G” to toggle grayscale mode. This is especially useful because color can sometimes make two colors appear more different than they actually are. Looking at the painting in grayscale makes it easier to see whether your values have enough separation.
Experiment With Your Brushes
There are many different ways to paint fur and feathers in Rebelle, so the brushes you choose do not have to be limited to brushes specifically designed for hair. The important thing is to experiment with the behavior of each brush and find ways to use its properties to your advantage.
One particularly useful option for feathers is the Bristle Ribbon Brush under Oils and Acrylics. Its natural stroke begins with a taper, becomes thicker, and then tapers again, creating a ribbon-like shape. Instead of allowing the stroke to complete its second taper, you can stop the stroke early to create a long feather shape. This can work especially well for longer feathers, such as those on a rooster's tail. You can also use stylus control to make these feathers more defined. Pausing briefly during a stroke can create a more noticeable feather shaft, while quickly zigzagging backward and forward at the beginning of a stroke can emphasize the base. The way you release the stylus also affects the tip: a stronger flick creates a sharper point, while a slower release produces a rounder tip
 Another interesting feature of the Bristle Ribbon Brush is its ability to produce strokes with varying colors. Adjusting the RGB sliders allows you to alter the color behavior and introduce additional variation into the texture.
For softer, rounded textures, the Dabber Fan Brush under Oils and Acrylics is worth experimenting with. It creates a rounded, textured pattern that can work well for fur around neck creases, feathers around a bird's forehead, and more specialized feather patterns. It is also useful for building layered, shadowy fan-shaped areas within fur. When using it, exaggerating the angle of your stylus approach can help control the direction of the pattern.
The Flat Dry Brush is another good option for fur. Keeping the strokes medium-short and layering them with different values creates a natural buildup of texture. A little blending can help unify the strokes, while using an eraser along the edges introduces randomness to the fur tips and prevents the texture from looking too mechanically repeated.
The Glaze Filbert Brush under Express Oils can be adapted for both fur and feathers. In Paint and Mix mode, it can create wispy groups of medium-short strokes that resemble either a fur clump or soft feathers. You can then switch to the eraser to add a central shaft and diagonal lines, making the texture read more clearly as feathers.
The same brush can also handle several different types of fur. At around 50% opacity, very short strokes repeated in the same direction can create shorter fur. Longer, curving strokes reveal more individual hair shapes, making the texture suitable for shaggy, tangled, or unkempt coats. Combining dark values, midtones, and highlights helps give this longer fur additional depth.
Practice with the Texture Before Painting the Whole Animal
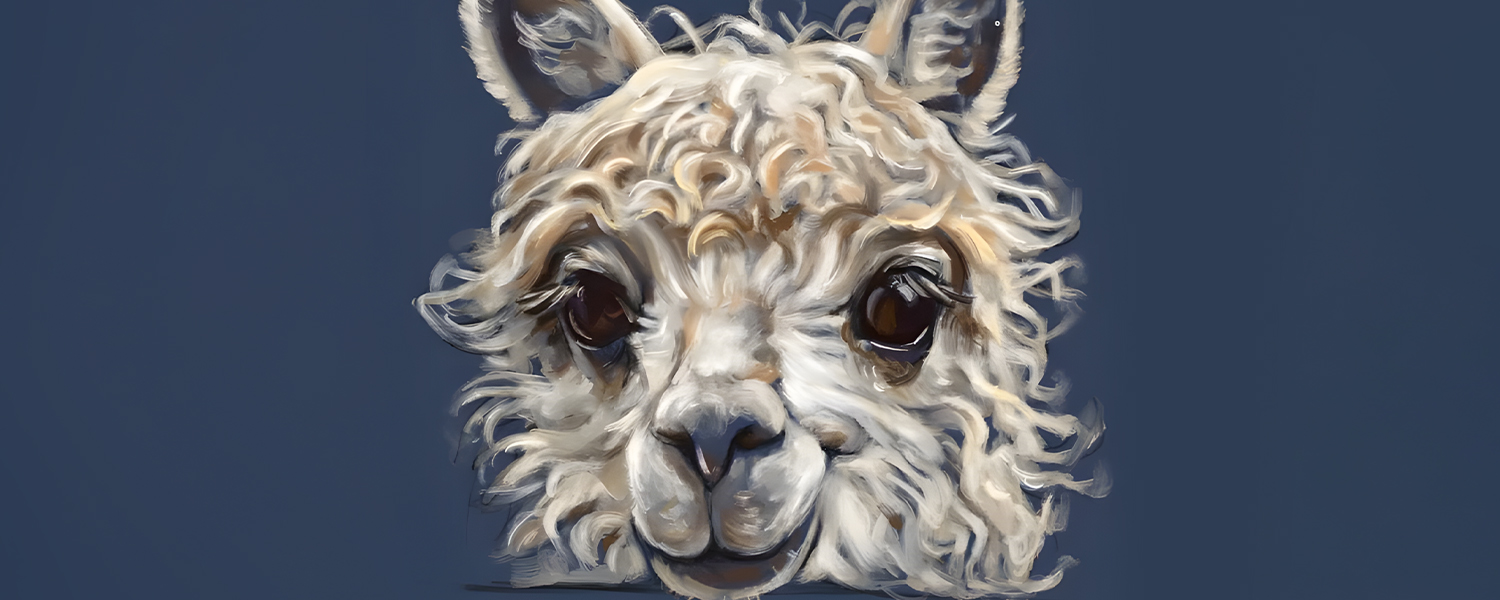
A good way to put these ideas together is to create a small texture study. An alpaca provides a particularly useful example because its face combines short fur with longer, wild, twisting hair. Before painting, examine each section of the animal separately. On the bridge of the nose, the hair radiates outward in an arc. Above the eyes, it moves upward and toward the sides. The shorter muzzle hair follows a curved horizontal pattern that spreads outward from the center of the face. On top of the head, the longer hair forms a large, mop-like shape made from repeating S-shaped curls that move downward and outward. The inner ears contain fluffy hair that travel outward, while the hair around the ear edges are much shorter and follow the outer curves.
Once these directions and patterns have been identified, the painting becomes much easier to organize.
Build the Texture from Large Shapes to Small Details
When beginning the alpaca study, start by blocking in the main fur patterns rather than immediately painting individual hair. Working from a darker midtone base and painting a lighter value over it allows the darker color to remain visible between the strokes, helping preserve the overall direction of the fur. At this stage, concentrating on only one lighter value is useful because it lets you focus entirely on the direction and shape of the fur. Make sure the major sections of the coat are flowing in the right directions before worrying about smaller details.
Once the main texture is established, gradually introduce darker values around areas such as the eyes, nostrils, and mouth. Then begin adding midtone color variation and highlights. Different hues can be worked into both the lighter and darker areas to create a richer, more natural appearance. Softening selected areas with a blender can help transition between colors without destroying the texture. Finally, strengthen the brightest highlights where needed. These small accents can bring the fur to life, but they work best when they are added after the larger value structure and texture are already established.
Think in Texture, Not Individual Hair
The biggest takeaway is that convincing fur and feathers are not necessarily created by painting every single strand. Instead, start by understanding the larger visual structure. Identify the repeating patterns, follow how those patterns change direction around the form, and establish clear value relationships to create depth.
Once those foundations are in place, brushes, stylus pressure, speed, erasing, blending, and color variation can add the smaller details that make the surface feel natural.
Most importantly, do not be afraid to experiment. Different brushes can produce surprisingly useful textures when you learn how to control their behavior. The goal is not to find one perfect fur or feather brush, but to understand how the tools you already have can be adapted to the animal you are painting.
Happy Painting,
Escape Motions Team
-----
Learn more about Ryanne Levin: escapemotions.com/featured-artists/ryanne-levin

What do you think?
0 Responses
0
Upvote
0
Funny
0
Love
0
Surprised
0
Angry
0
Sad
Sign in to comment!
Be the first to comment.