
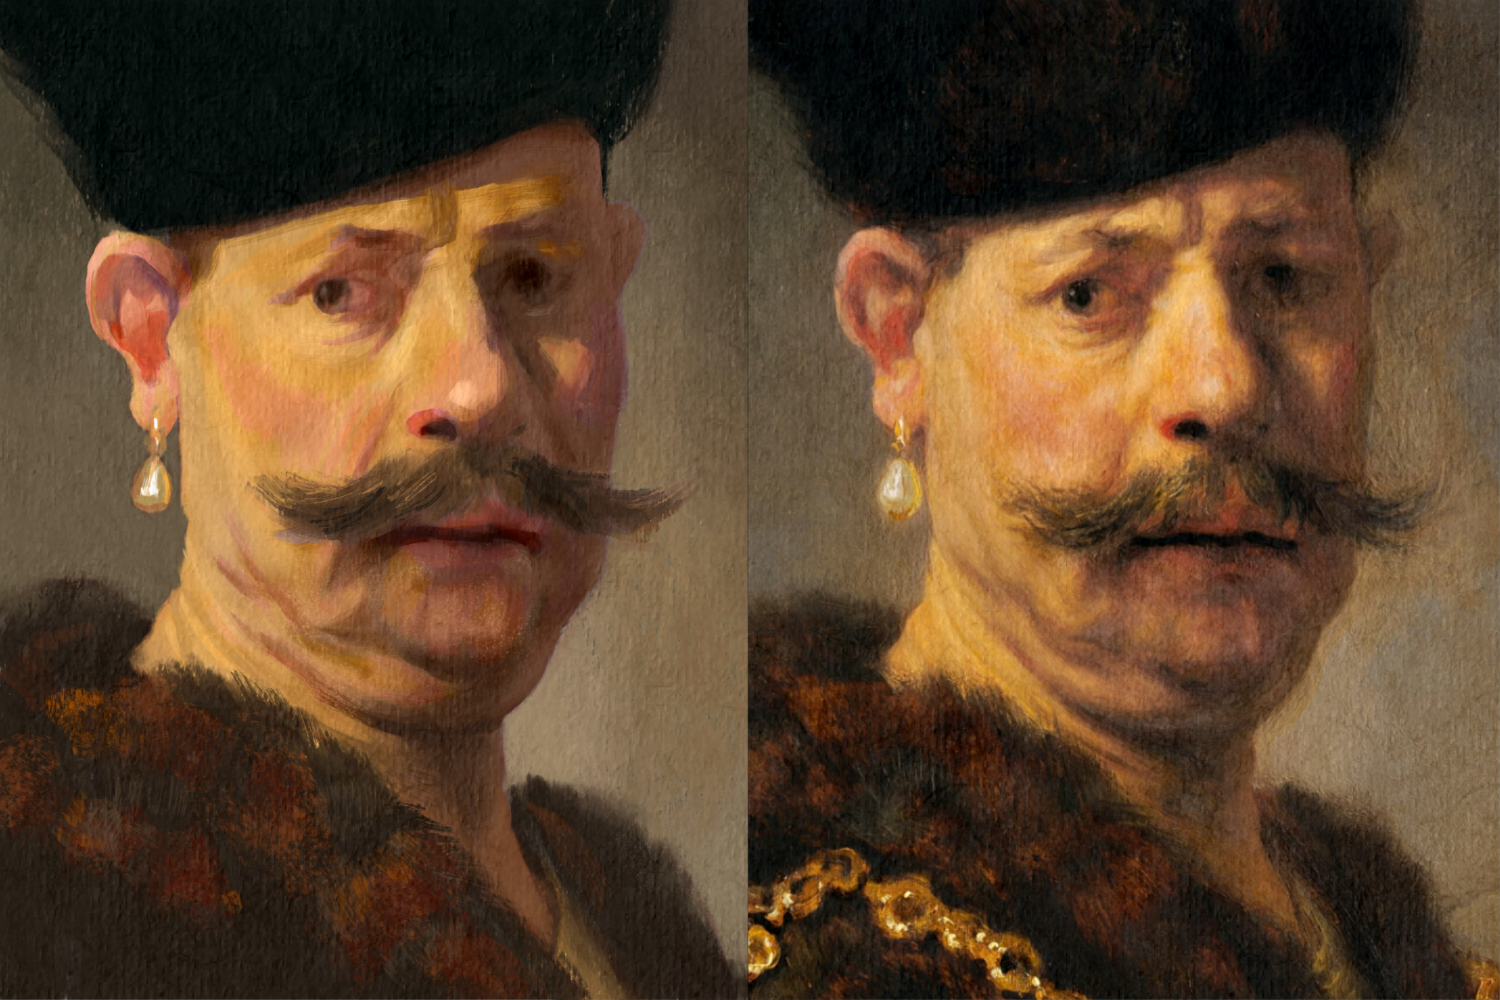

If you are looking for new ways to approach your painting, we are excited to provide some tips for you. Rebelle Featured Artist, Angela Tribbeck, opens the door to her creative space and walks us through the use of layer blending modes in her painting process. She decided to recreate one of Rembrandt's masterpieces in Rebelle 6. Let’s dive into painting with Angela.
I started to use the layer blending modes about two years ago and I find this approach particularly helpful, especially when painting from imagination. For this case, I decided to use a reference because I wanted to try to recreate one of the master artworks from Rembrandt, to see if it is possible to make such a painting digitally.
Step 1: Layer Preparation
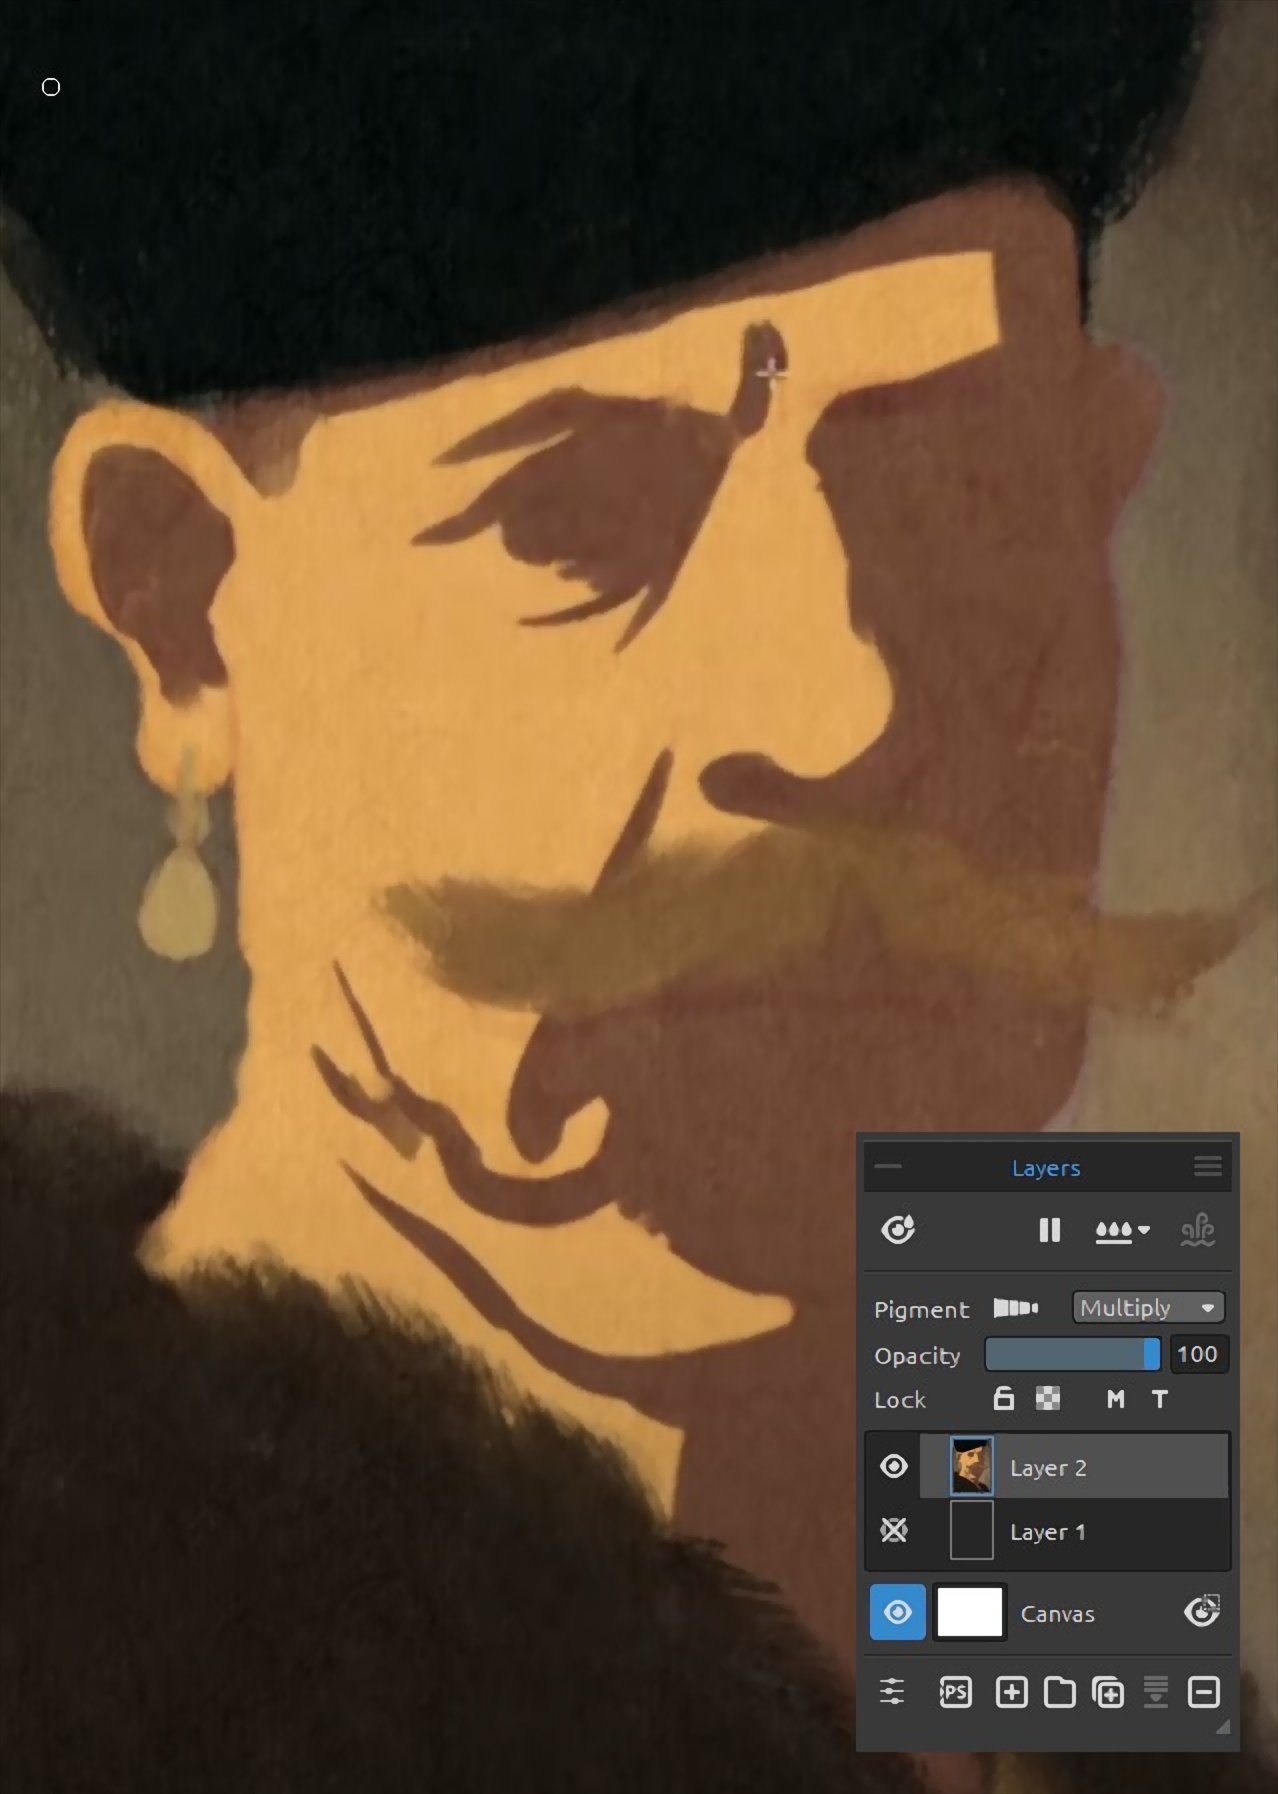
The key to using various layer blending modes is to prepare separate layers. In this case, I made layers for the background, face, mustache, clothes, sketch, and reference. Firstly, I am going to work with the Multiply mode. I need to create a Multiply layer above the base layer, clip it, and paint in the shadow. This is great for darkening the value while also adding color. At this stage of the painting process, I don't need to worry if the color and value are correct. I can just concentrate on the drawing and if I want to change the color and value of the multiply layer later I can do so with Hue, Saturation, or maybe Color Balance filters.

Step 2: Using Multiply Layer
In the next step, I'll add another Multiply layer and paint the darker areas. At this stage, I need to check the values again and then merge the two Multiply layers together. This merged layer still acts as a Multiplied layer. I'll clip it again to the base and add another Multiply layer, this time for the mustache. During this process, I switch between layers if I see any feature that needs a touch-up as the painting evolves.
When needed, I will use another layer with Saturation blending mode to paint in the areas with less saturation. Then I return back to the face layer and add some color variation. I will add a couple of separate layers, where I deal with color, saturation, and values. Sometimes, I will reduce the opacity before merging these layers, to get the desired effect. Lighten layers are great for adding reflected light into the shadows without painting over the areas in the light. A good example here is the light bouncing off his nose into the eye area.
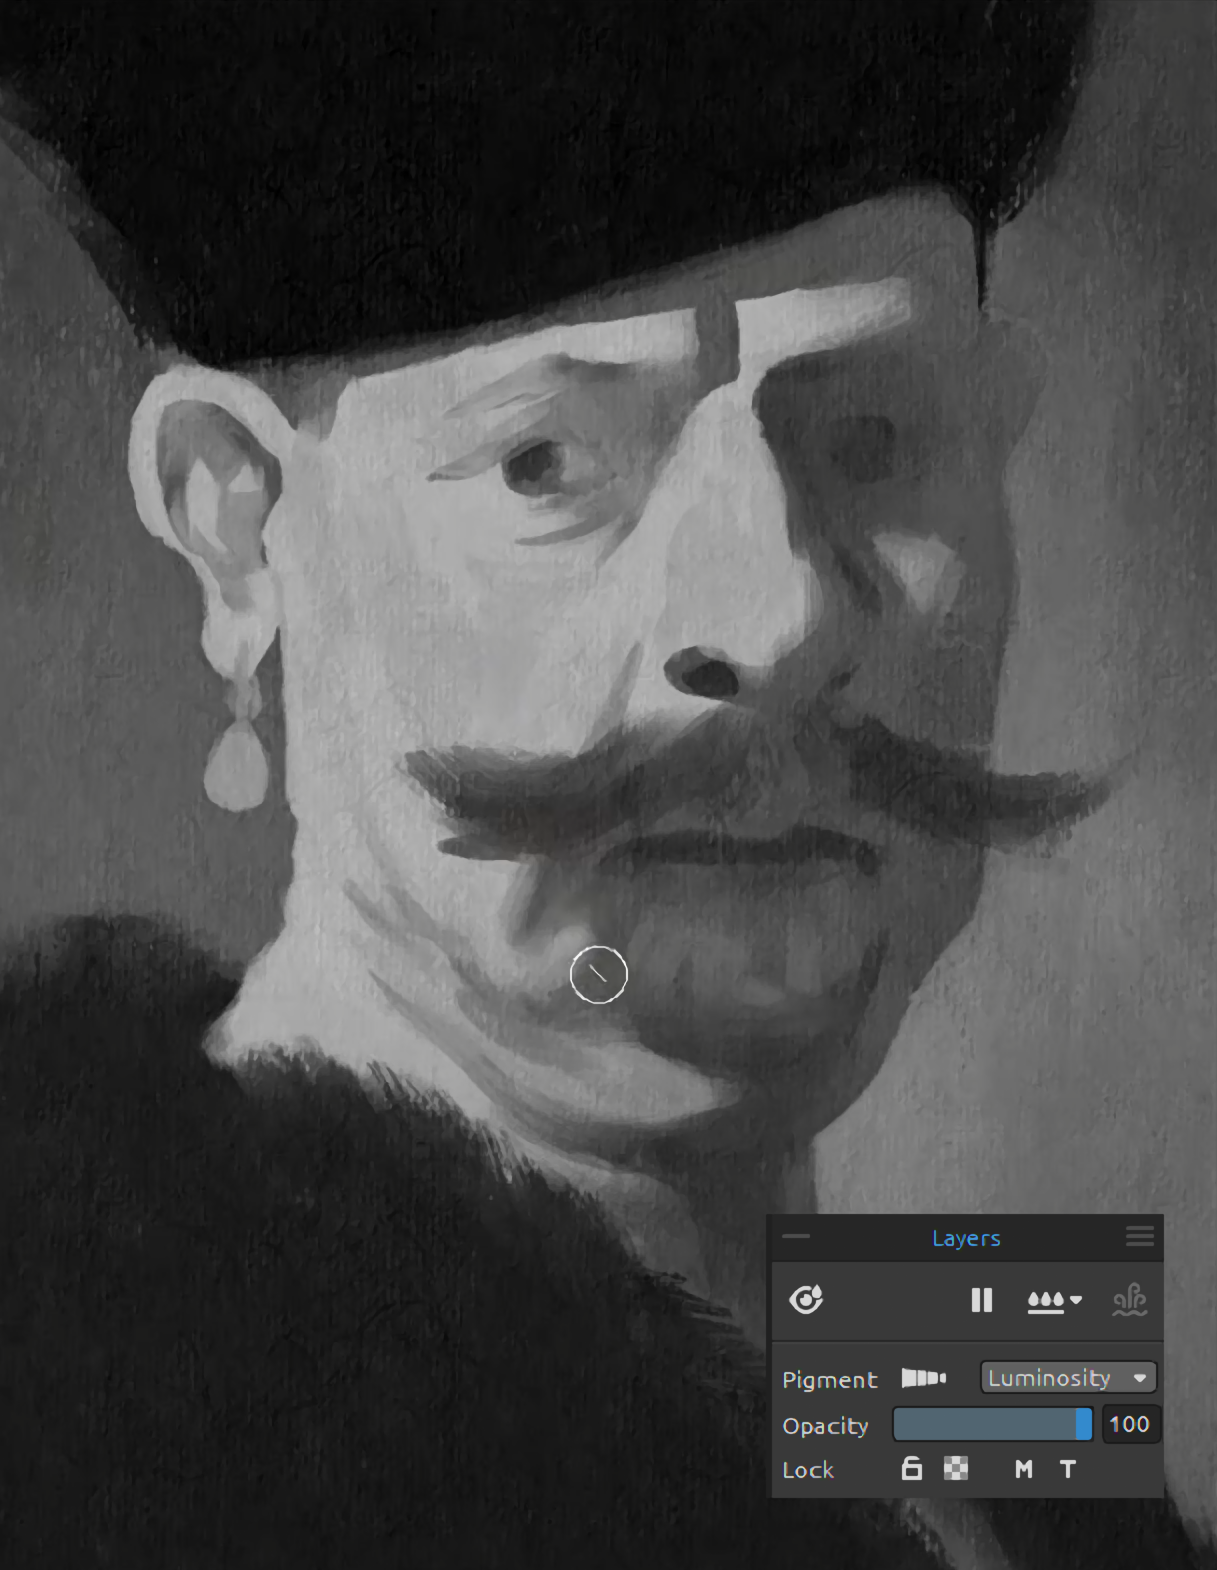
Step 3: Dealing with Light
I suggest adding a Darken layer to paint within the triangle of light on his cheek without affecting the surrounding shadow. I will use the Luminosity blending mode next. Often when using a Luminosity layer I switch to Grayscale as it's only the value that matters not the color or saturation. Painting like this means I only need to concentrate on one thing at a time. I'm able to think about color and value separately and even when painting in a more conventional way I'll use layer blend modes to correct mistakes or experiment further.
Step 4: Color Mixing
One of my favorite ways to mix color is using a shortcut “X”. This feature has a wonderful way of picking colors using a small amount of the color you pick and mixing it with the color that you already had on your brush so this can be used for making subtle changes in color or subtle changes in value, especially if you use the black or white. For this painting, I prepared my own color palette by taking a screenshot of the color wheel and picking the colors from there, then saving it as an image. I use it in the Reference Image panel, as I don't need the extra functionality that the mixing palette has.
Step 5: Final Adjustments
In the next step, I will merge the layers to the face layer. If I was painting from imagination I might leave the layers there until I'm certain that's how I want it to be. When using layer blending modes, I will often change the behavior of the Color Pick feature as sometimes I want it to pick from all layers and sometimes I'll just want it to pick from the current layer. For example, if I was painting on a Luminosity layer, I'd probably want to pick a color from all of the layers, whereas if I was painting on a Multiply layer, I might only need to pick a color from the current layer.
If I were painting a subject that was mostly in the shadow, I would paint the flat base layer as the shadow color and then I would add the light with a Linear Light layer instead of using a Multiply layer. Another layer type that I like to use is a Soft Light layer to lighten or darken while also adding color. Color Dodge blending mode is particularly useful with metal.
To finish the painting, there are some adjustments to be made. I've noticed that the eyes need to be darker so I duplicate the base layer and set that layer to Luminosity and bring up the curves filter and make some adjustments.

I can then add a layer mask to that layer, fill it with black, and paint it with white where I want the adjustments to show through.
I think I am quite satisfied with the result. The painting process, including the preparation beforehand, took about two hours. You can find this painting process also on the Escape Motions YouTube channel if you prefer a video tutorial.
I hope you enjoyed my tips and will give this approach a try.
Happy Painting!
Escape Motions Team
text and images provided by Angela Tribbeck
-----
Angela Tribbeck's passion for art began at a young age, but practical considerations led her to pursue a more stable career, ultimately in the legal profession. Despite this, her love for art persisted, and about 8 years ago she returned to her creative roots. Using books and online resources, Angela finds great enjoyment in delving into the fundamentals of art, honing her skills experimenting with various techniques and processes while utilizing the natural look and ease of use of Rebelle, which has become her primary painting software.
Visit her Featured Artist portfolio: escapemotions.com/featured-artists/angela-tribbeck
What do you think?
0 Responses
0
Upvote
0
Funny
0
Love
0
Surprised
0
Angry
0
Sad
Sign in to comment!
Be the first to comment.