

Harvey Bunda, an accomplished art director and keen Flame Painter user, explains how Particle systems make a range of effects possible, in the third part of his Core Skills series on the software. Continue reading to find our more about six Particle systems and their useful settings.
 In this tutorial, we will be going through the range of particle painting systems that feature in version 4 of Flame Painter. We will also talk about how to use them and how to adjust their settings so you can achieve the effects, you are looking for. The system has been designed to be intuitive and enables artists of differing abilities to add eye-catching effects to their work. There is a range of brushes in each particle system that are capable of creating flowing, whiplash, neon dots, or even tentacle-like brushstrokes, suitable for any concept art or illustration project.
Get started with Flame Painter Particle systems
There are three particles systems that are included in the installation package: Flame, Ribbon, and Follow. The other three – Liner, Fuzzy, and Elastic – are available for download as paid add-ons available on the Escape Motions website, priced at $19.99 each. Let’s take a quick look at the characteristics of Flame Painter’s six particle systems:
Flame - this is the classic particle system that has been part of Flame Painter since the very first version of the software.
Ribbon - select this system to create a series of particles that look like they are swaying, waving, or moving like a long piece of cloth blowing in the wind.
Follow - your particles follow the cursor precisely in this system.
Liner - this particle system has a thin flat brush profile with a defined width.
Elastic - a versatile particle system with an elastic brush cursor. It is useful for creating soft-body effects.
Fuzzy - a string-based winding particle system that can stretch its particles along your chosen path.
Each particle system has different sliders for editing your brush’s properties, giving you almost limitless customization options.
Choose brushes to use with your particle system
Flame Painter’s brushes can be used to create all kinds of photo and graphic effects. Each particle system comes with a set of brush presets, which means there are over 250 brushes to experiment with. There is also a free online Brush Library from where you can download new brushes.
Here I am using the Fuzzy particle system and Fern, the designated brush for the system, to paint some foliage under the tree.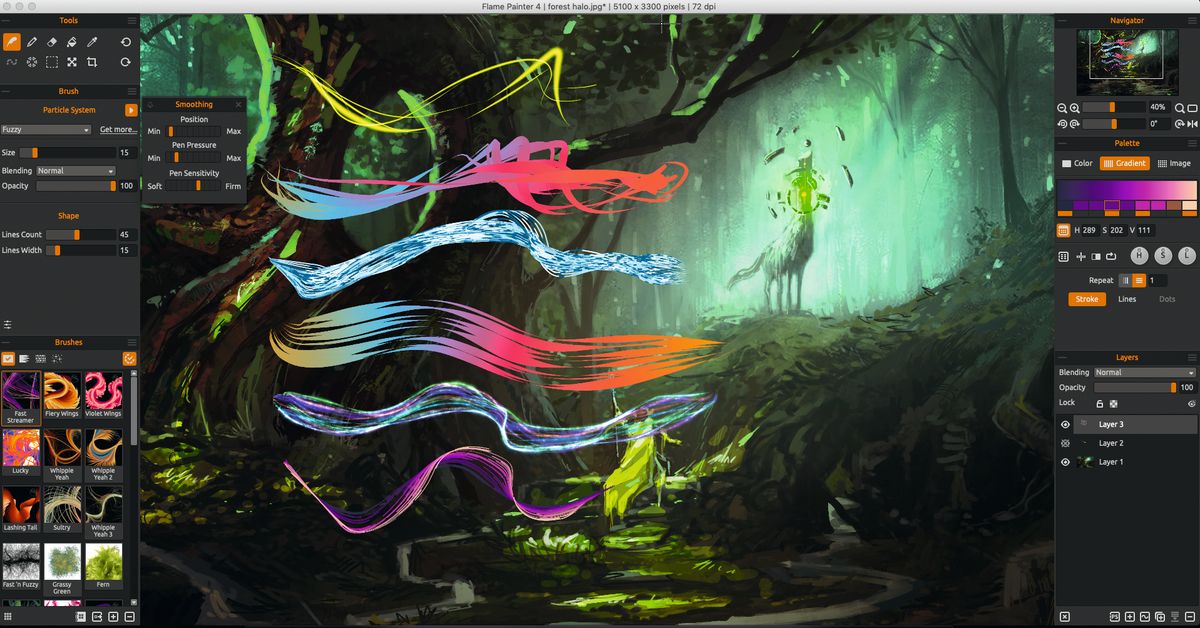
Set the Size, Blending, and Opacity of your particle brush
The Brush Properties panel has the three key settings for every rush in the particle system: Size, Blending, and Opacity. There are three blending modes: Normal for regular painting; Lighten is usually for light effects and darker backgrounds; and Darken for lighter backgrounds.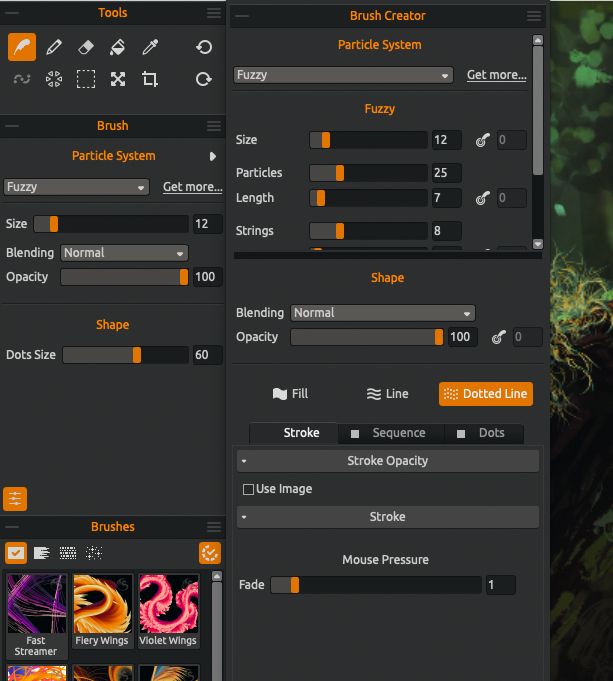
I mostly paint my particles at minimum Position, low Pressure, and semi-high Sensitivity. My brush size will vary depending on the size of the Blending effect that I will be using on the brush. I stick with the default Lighten setting and my line count usually remains low as well.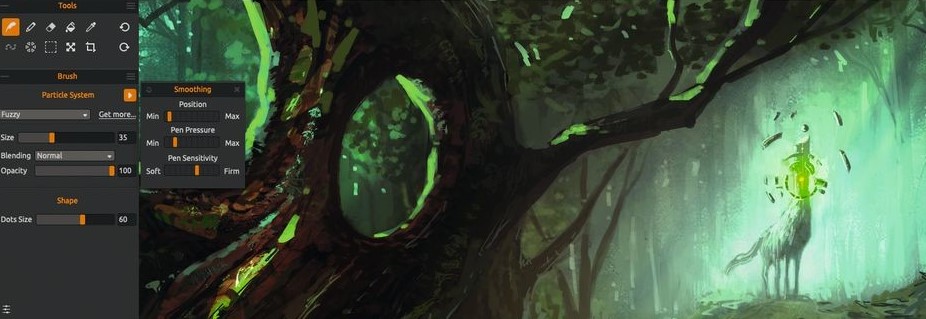
Define the shape of your brush
Depending on which brush you are using, you can set the Count and Size of the lines or dots that influence the final appearance of the brush. Indeed, you can customize every parameter using the new Brush Creator panel – I recommend spending some time experimenting here.
Explore the Color palette settings
You can choose whether you want to paint with a solid color, a gradient, or with an image. The image will be mapped on the stroke, lines, or dots and can be repeated on both the length and width of your strokes. HSV, RGB, HSL, and HSLuv color models are also available.
You can load images and shapes from Flame Painter's Image Library.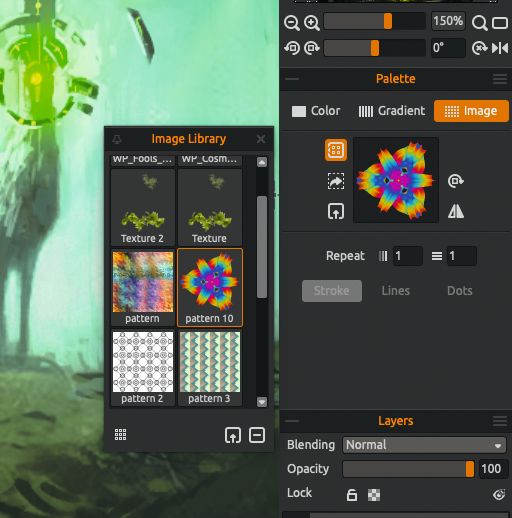
On the Gradient palette, you can change the Hue, Saturation, and Lightness by pressing the circular grey buttons.
In the final installment, I will take you through the stages of spicing up your artwork using a handful of these versatile brushes. I will be explaining how you can properly execute an effect and blending options, which you can use on elements in your fantasy and sci-fi compositions, to make them pop.
Stay tuned!
Harvey Bunda
Originally published in ImagineFX #184. Permission to republish granted by Harvey Bunda and ImagineFX editorial team.
---
Artist's profile:
Harvey Bunda is an art director and an avid mentor to developing creative teams. He is the artist behind several game titles from mobile, tabletop, and triple-A titles. Furthermore, he has produced artworks for book covers, concept art for games, and toy designs for Marvel Heroclix, Mattel, Wizards Of The Coast, Lucasfilm. Harvey is well versed in working on paintings, traditional mediums, and sculptures as well.
Visit his portfolio: https://www.escapemotions.com/featured-artists/harvey-bunda
Harvey's website: https://www.harveybunda.com/
What do you think?
0 Responses
0
Upvote
0
Funny
0
Love
0
Surprised
0
Angry
0
Sad
Sign in to comment!
Be the first to comment.