

A substantial update for Rebelle is now out! For the past month, we've been working tirelessly on the 7.1 version which features upgraded papers and revised brushes that will bring the expression of digital painting much closer to reality. The update also includes many new additions, a handful of useful changes, and bug fixes. Let's dive right in!
We'll start with the important changes we felt needed our love and care and we believe it will make your painting experience much more joyful:
Papers and Art Surfaces
From the start, Rebelle 7 features improved paper surface analysis based on ray tracing. Ray tracing is a method of graphics rendering that simulates the physical behavior of light. This new method allowed us to detect the height map of the paper and distinguish between the peaks and valleys of its structure which secured a more natural painting experience.
With so many artists getting their hands on the newly released software certain issues surfaced:
Problem 1: The paint strokes did not look as we expected on some papers
With some settings, the brush strokes did not look as natural on different papers as we intended them to. With almost 140 papers and more than 250 brushes in arsenal, we had to deeply investigate, test, and set up each paper surface exclusively.
Problem 2: Higher or lower DPI caused artifacts
With various DPI settings, some artifacts could appear on the paper structure such as stripes or unwanted dots. The issue arose from the high contrast caused by how the ray tracing was set up. Since many other values are coming into the equation combined with very different levels of DPI, not all possibilities have been evaluated before the release.
Revised Papers and Brushes
We appreciate everyone who took the time to report issues, either by e-mail or in the forum, it helped us in uncovering these problems.
In our pursuit of the utmost realism, we carefully configured each paper surface to achieve lifelike results. Iterating through each paper and testing them with various brushes, we ensured their optimal behavior during painting. The ray tracing has been modified and fine-tuned in the 7.1 version, providing a more accurate representation of the paper's surface. These changes are incorporated into the papers in version 7.1; there's no need to reinstall them.
Another challenge was to make papers universal for every painting tool. Traditionally in reality, specific papers or canvases are usually made to be used with specific techniques only - washi is best for inks and watercolors, while canvases aim mostly for oil or acrylic paint. In Rebelle we wanted to ensure that painting tools and styles are quite universal and look as realistic as possible on every type of paper.
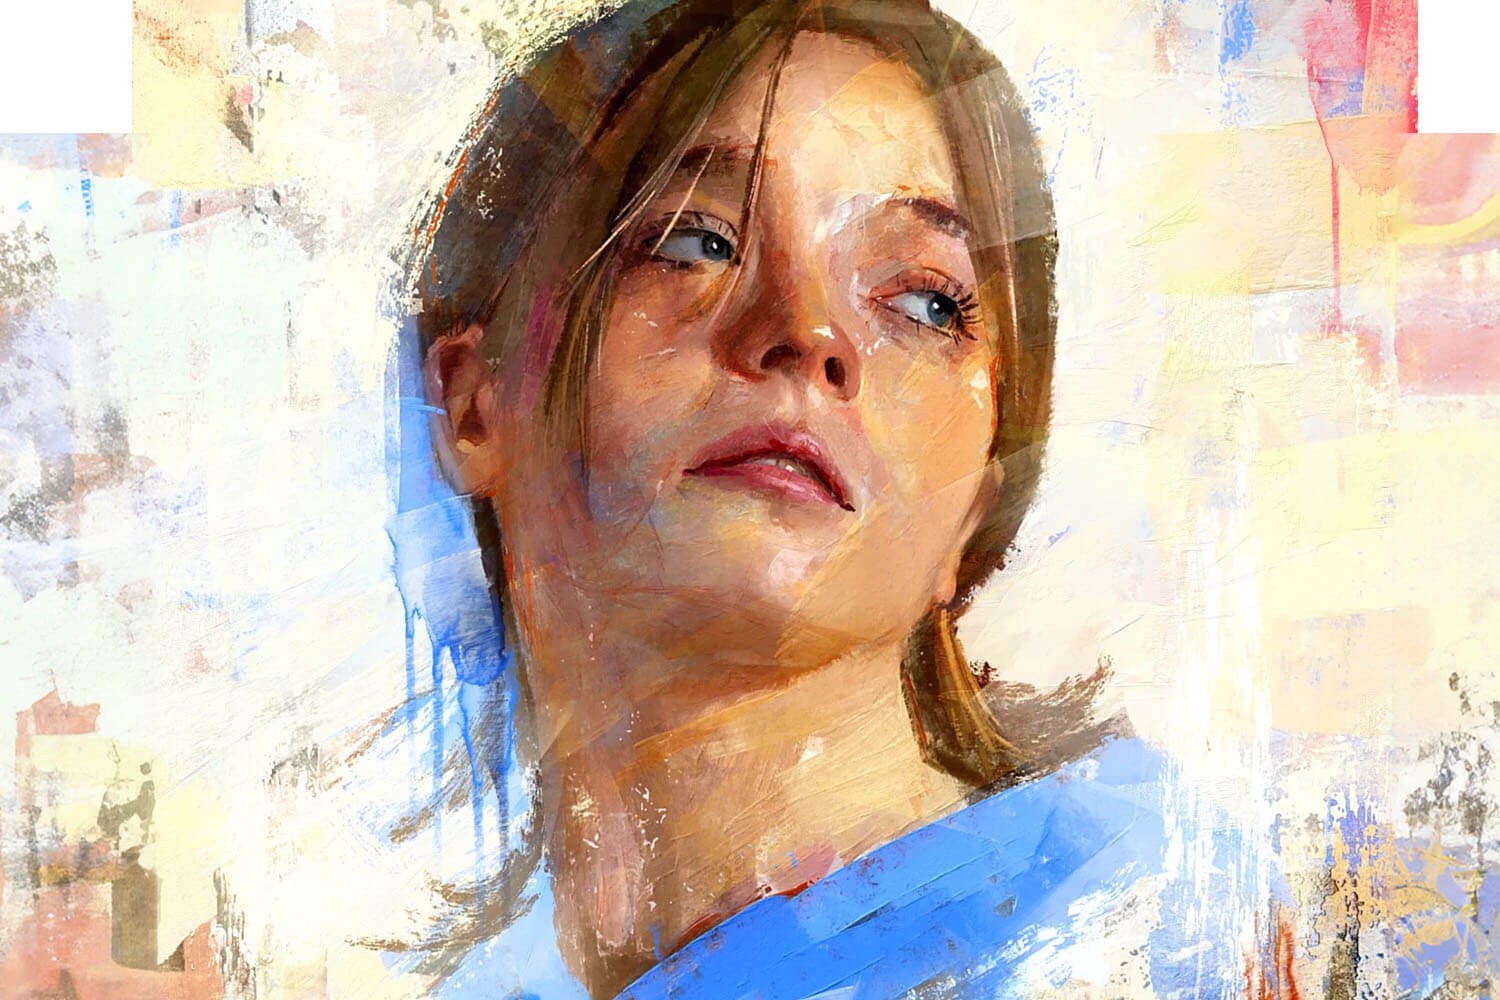
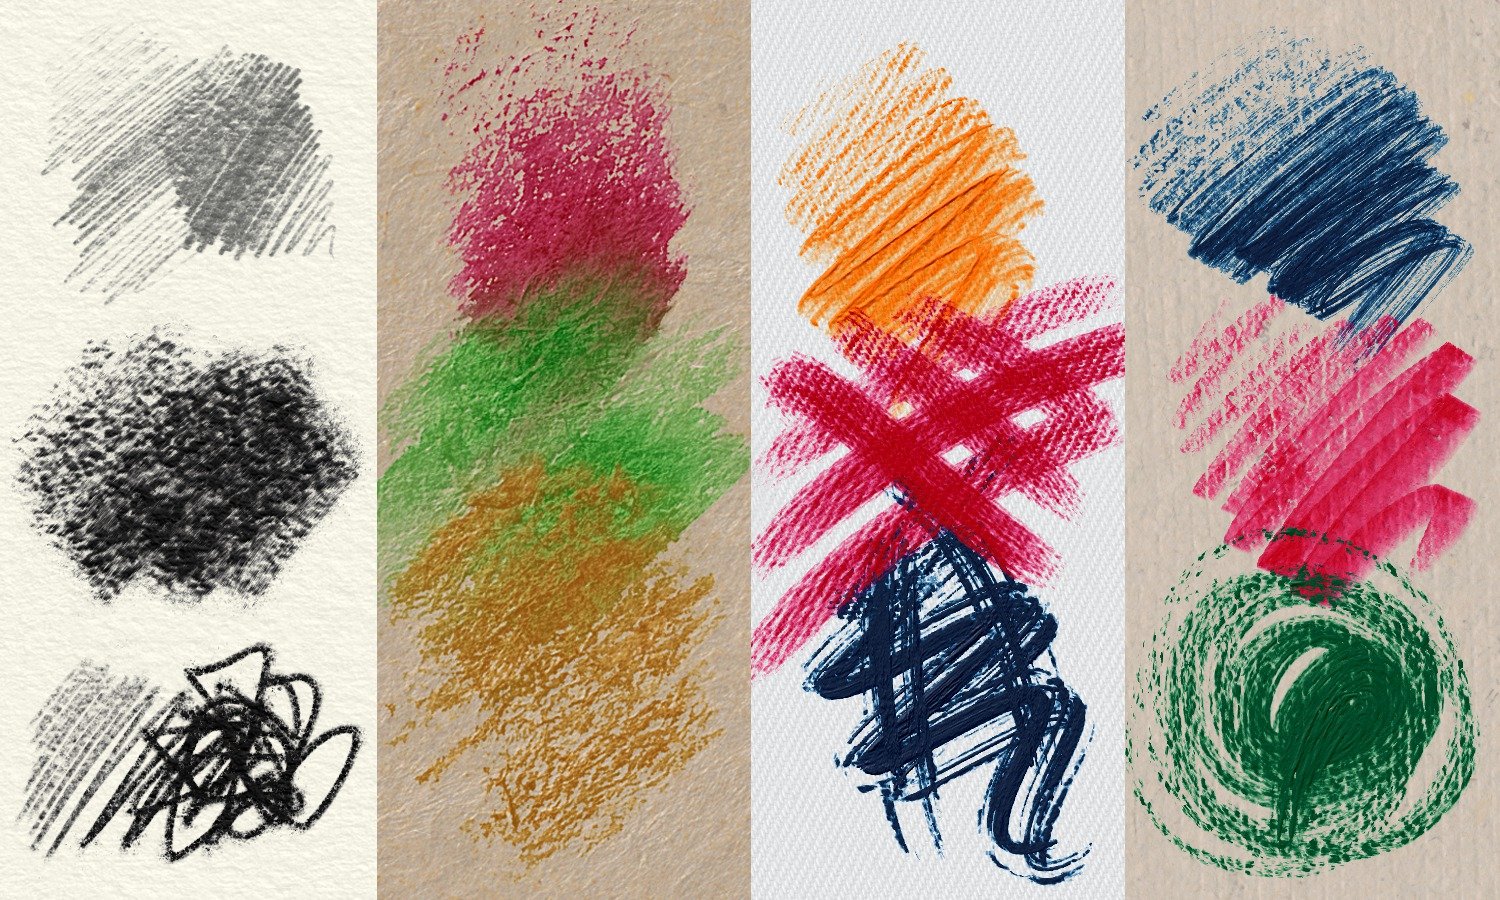 Examples of different media on various papers in Rebelle.
How the brush is set up is very closely related to how it will react with the paper surface. Rebelle 7.1 comes with a complete revision of the brush presets. Some changes are very subtle, some are more visible, one of the main goals was to set the brushes to react better with the paper surfaces. Tools with the revised brush presets are: Oil & Acrylic, Express Oils, Watercolor, Ink, Pastel, and Pencil tools. These new brush presets will come with the new Rebelle 7.1 installation.
How to install the revised brushes:
1. Download the 7.1 brush presets from the link:
https://www.escapemotions.com/products/rebelle/media/Rebelle_7.1_Revised_Brushes.zip
2. Drag & drop the downloaded .zip file (do not unpack it) on the canvas of the Rebelle app.
3. It may take up to 20 seconds to install and then will pop-up the window with the text: "New assets were installed".
This process will create new groups in Oils & Acrylics, Express Oils, Pastels, Watercolors, and Ink tools featuring the revised brushes. Groups will have the suffix "7.1" (e.g. in the Oils & Acrylics will be a new brush group: "Flat 7.1").
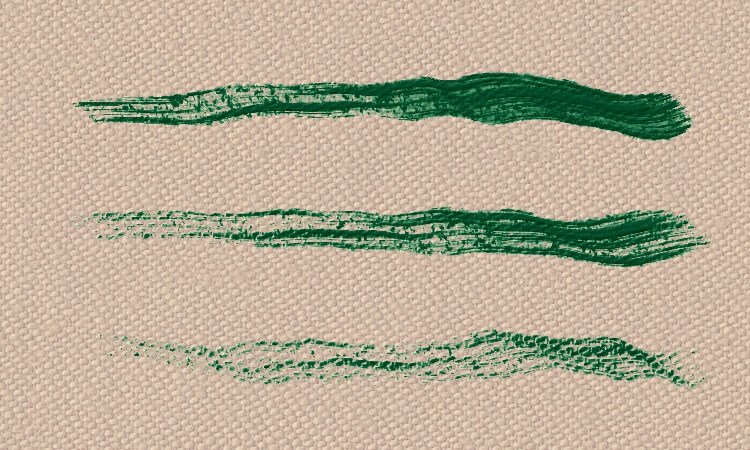
Below we'll discuss key settings that impact the behavior of Oil & Acrylics and Express Oils brushes on paper surfaces:
Loading slider
Increased Loading adds more opacity and impasto volume to the brush, with less Loading, you can get more glazing-type brushes with no impasto.
Note: Compared to Rebelle 6, the Loading slider does not change the smudginess of the brush stroke. This behavior can be changed in Brush Creator > Stroke > Nonlinear Opacity.
Note: Only "Oils & Acrylic" brushes have thick impasto.
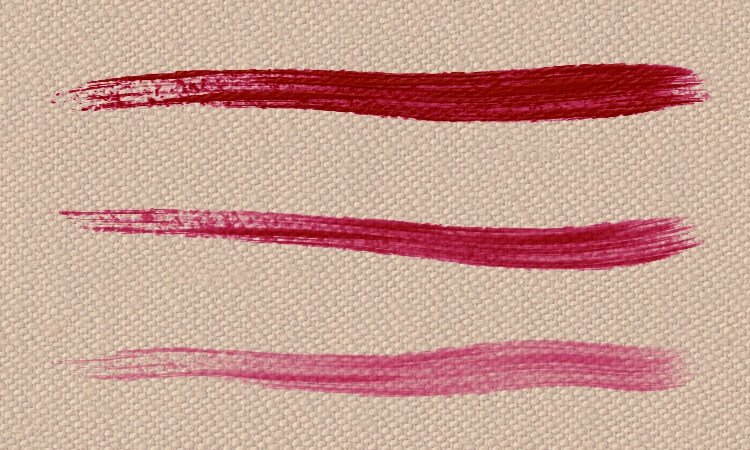 Comparison of strokes with various Loading values: maximum Loading (top), medium Loading (middle) and low Loading (bottom)
Oiliness slider
The Oiliness slider in Rebelle ranges from 1 to 100. The strength of the interaction between the brush stroke and the paper surface is set individually per brush preset. When the value is set to 0 the brush stroke scratching on the paper surface is the most significant. Up to the value of 50, the scratching on paper will gradually start to diminish. From the value of 75, it gradually declines and is non-existent with the oiliness slider set to 100.
Simultaneously, the smudging effect linearly intensifies from lower to higher values.
Note: The strength of the interaction between brush stroke and paper can be set in Brush Creator > Paint > Paper Texture Strength.
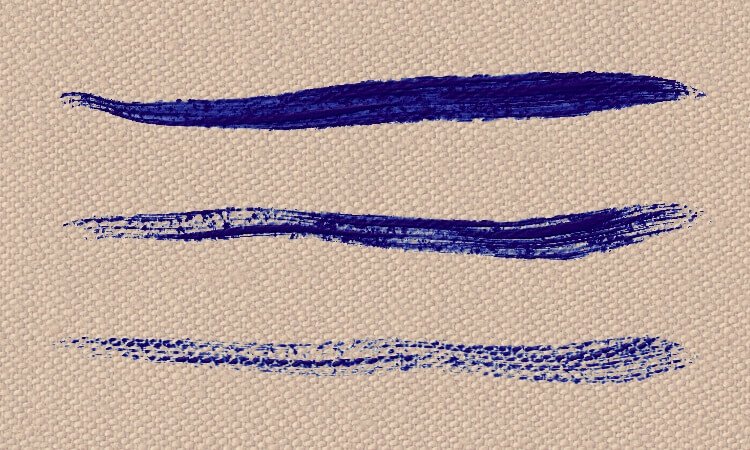 Comparison of strokes with various Oiliness values: maximum Oiliness (top), medium Oiliness (middle) and low Oiliness (bottom)
Pressure slider
The "Pressure" slider also plays a role in shaping the brush preset's behavior on paper. In general, this slider limits the maximum pressure achievable with the stylus or mouse. Lowering the pressure slider may result in a stronger surface scratching and lowers the smudginess.
Note: By default, the "Pressure" slider is hidden, to show the slider, go to the Properties panel menu: Show Sliders > Pressure.
 Comparison of strokes with various Pressure values: maximum Pressure (top), medium Pressure (middle) and low Pressure (bottom). Full stylus pressure was used for each example.
Fine-tuned pressure curves for Paint, Mix and Blend
In version 7.1 we have also balanced the pressure curves for Paint & Mix, Paint & Blend and Blend mode for all tools except Oils & Acrylics. This adjustment helps with brush smudge behavior with pressure-sensitive styluses.
Note: You can still customize the curves based on your choice globally through the menu Edit > Preferences > Tools > Open Curve Editor, or locally for each brush preset in Brush Creator: Paint > Mixing > Paint Mode > Curve Editor.
Changes coming with Rebelle 7.1 update
We continue improving Rebelle 7 step-by-step through a series of minor updates that include crucial fixes and some minor changes. Following the initial release, we have already rolled out eight updates, with the latest being 7.1. The refinement of papers and brushes alone for this update spanned over a month, and our commitment to improvement doesn't end there. In this blog, discover additional features and changes we've been working on for the past month.
New UI for editing stencils, paths, and structures on the canvas
When an item is placed on the canvas, a new menu opens next to the item which gives you the option to move, scale, rotate, hide, and set the specific behavior for the selected stencil, path, or structure.
Note: The menu is similar to Rebelle 6 just with more features.
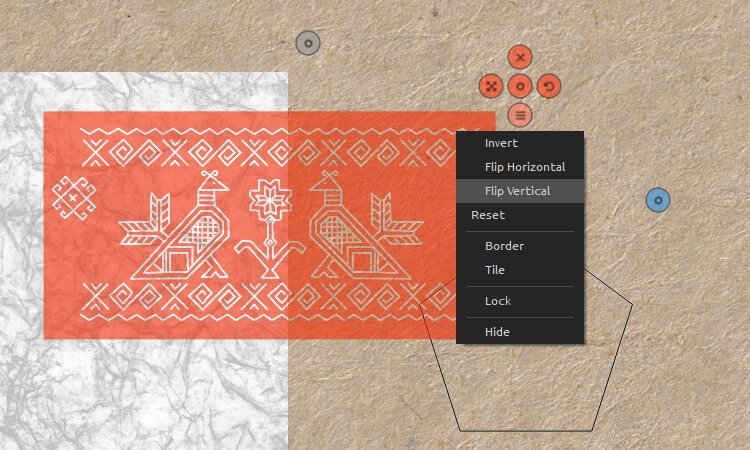 Icons appear for each item on canvas, allowing you to scale, rotate, move, or hide. Additional options are available from the menu.
Multiple stencils, paths, and structures can be used on canvas at the same time
What's also great is that changing the UI enabled to have multiple stencils, paths, or structures placed on canvas. You can show / hide the tools from the panel or directly on the canvas via the tool menu.
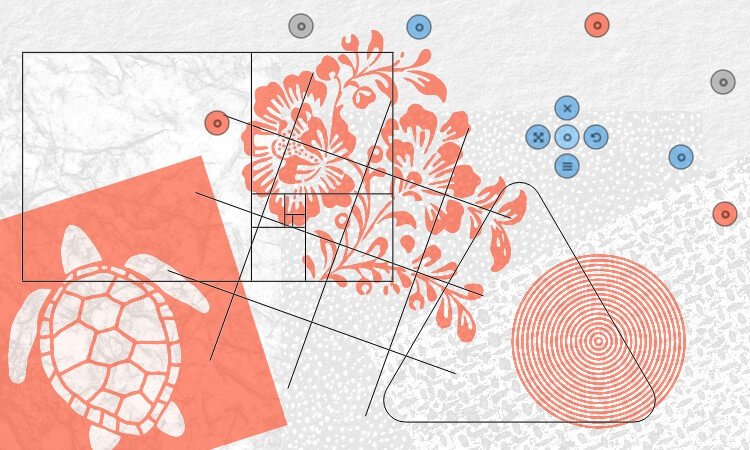 Rebelle 7.1 allows you to work on multiple stencils, paths, or structures at the same time.
Changed interface behavior for Libraries
To open an item from the Library to a panel, whether it is a stencil, path, structure, mixing palette, or reference image, only one click is necessary. We removed double-clicking as it was not practical to use especially with stylus, and is no longer needed after the UI changes we made.
By clicking the item in the Library, the item will load in the specific panel. For paths, structures, and stencils it will also open the selected item directly on the canvas.
Scale patterns in the Fill tool
A new option to scale patterns has been added to the Fill tool. In general, 100% scale represents one-quarter of the texture - this provides better texture sharpness at higher scales.
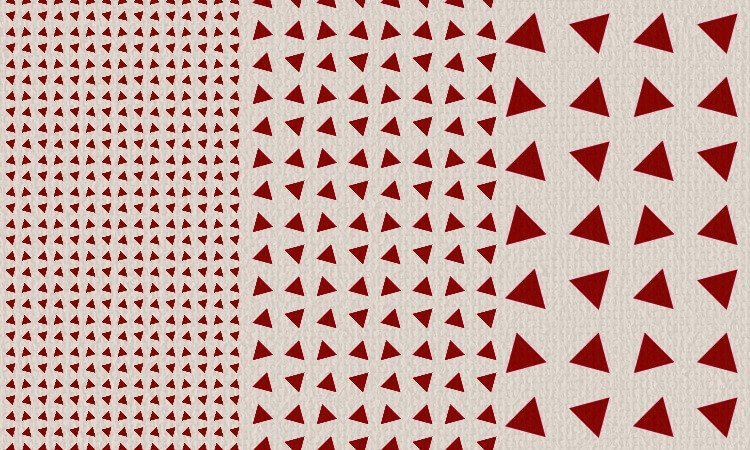 Scale the patterns in Rebelle 7.1's Fill tool.
New option to refresh content without the need to restart Rebelle
From Rebelle 7.1 you can find a new option "Refresh Content and Libraries" in the Help menu. This will re-load the content from the user folder into panels and libraries (e.g. shapes, grains, brush presets, color sets, stencils, …). This was not possible before and you had to restart Rebelle which could seem like an unnecessary extra step.
Further Rebelle 7.1 Changes and Fixes
Changes
- Oiliness slider in the lower values is more pronounced for Oils & Acrylics and Express Oils
- Pressure parameter (from Properties panel, hidden by default) now limits maximum pressure used by various pressure-controlled brush features except brush and dual brush size.
- Pressure parameter is visualized (grey area) inside curve editors that are affected.
- Dual Brush and Background Textures blending modes that remove alpha (for example Multiply) removed less alpha with lower Opacity parameter values (from Properties panel). This has been corrected.
- "Weight Curve" editor has been renamed to "Depth Curve" editor
- Changed UI behavior for Libraries, add item to current panel with one click (Color Set, Stencil, Path libraries, etc.)
- Show/hide multiple stencils, paths, and structures from panels
- Updated UI for Filter layers: When Filter Layer is created, settings open automatically
- Highlighted Filter layer icon when hovering over the layer icon
- Changed tooltip in the side panels to "Unpin/Pin Panel"
Fixes
- Brush splat rotation is now more precise in "Follow Trajectory" mode
- Fixed: Dual Brush now removes alpha smoothly in "Use for Stroke" mode
- Fixed: Painting with dry tools could remove some flowing paint
- Fixed: Locking the angle in Transform mode is now working
- Structures: If the canvas was tilted, structures were cut incorrectly in Edit mode
- Structures now appear correctly when more layers are used
- Stencils: Names were not set correctly when loading
- Show -> Canvas Bounds now show up correctly while editing Structures, Paths, and Stencils
- Fixed Canvas Resize after reference image transformation was active on canvas
- Fixed crash when switching from Stencils and Fill tool
- Fixed: Reference Image's Edit mode is now canceled correctly after hitting 'Esc'
- Fixed stuck cursor after resizing a brush with 'Ctrl' and hitting 'Alt' to pick color
- Fixed: Icons, links, and tooltips for links now appear correctly in the Reference Image panel
- Fixed: Reset Layout to default now resets Libraries as well
- Fixed: The order of the color swatches in color set was reversed upon restarting Rebelle
- Fixed "Don't need to confirm Pick Color tool with the mouse button" setting for Warmer / Cooler colors shortcuts (Alt+W / Alt+C)
- Fixed resetting of Hue and Saturation value when Lightness is set to 0
- Fixed: Entering values manually via the keyboard in the Filters dialogs did not work
- Fixed: Zoom/move the canvas and rotate is possible with Filter dialog window opened, even though the default keyboard shortcuts for these actions have changed
- Fixed: Docked panel tabbed with other panels now shows correctly after using the shortcut for showing this panel
- Fixed saving of REB file with color sets with unsupported characters (e.g. "&",...)
- Fixed: Color panel now loads .colors file, .txt file and PNG files correctly as a color set
- Fixed: Preview and Navigator panels sometimes stopped being updated
- Fixed crash after changing selection while Fill tool editor is active
- Fixed washed-out colors on wet areas while Fill tool editor is active
- Fixed reset pen pressure of Curve editors when switching to another curve
- Fixed crash when background textures were used with some texture scales
- Fixed: When Color Management is enabled, imported image without color profile behave according to Preferences "Paste/import images without profile"
- Fixed artifacts on images with hidden canvas saved through NanoPixel export
Go ahead and download the latest Rebelle 7.1 update from your Community profile. You can access the download links to the update also from within the software, just go to the menu Help > Update to 7.1. This update is free for all Rebelle 7 users.
The revised Rebelle 7.1 brushes can be downloaded from this link. Drag & drop the complete .zip file (do not unpack it) on the canvas of the Rebelle 7 app. New brush groups with the suffix "7.1" will be created for different painting tools.
Share Your Feedback
How do you like these new features and changes brought by Rebelle 7.1? Which one do you find practical the most? Tell us what you think in the comments below!
Also, if you experience any issues, please notify us! You can either post to the online Forum or send a direct email to [email protected]. Lastly, you can use the feedback form accessible directly from Rebelle's menu: Help > Send Feedback.
Happy painting!
Your Escape Motions Team
----
Cover Image by Rebelle Featured Artist Georg Ireland | Visit Portfolio
What do you think?
0 Responses
0
Upvote
0
Funny
0
Love
0
Surprised
0
Angry
0
Sad
Sign in to comment!
If someone is doing a fresh install using 7.1, do they have to drag in the new brushes or are they included automatically?
If R7 was never installed before, you have the new brushes automatically installed with R7.1.
This update seems amazing however at the moment the update is missing files that is presenting issues in the installation process so hopefully this will be fixed soon so I can test them out!
The dragging of the brushes into the app ddn't work for me, so I copied them over to where the brushes are installed. for me that was: C:\Users\{my username}\AppData\Local\Escape Motions\Rebelle 7\Brushes\
Dragging the brushes into the app hasn't worked for me either. Explain it better please
Hello, you have to drag & drop the entire .zip file (do not unpack it).
OK, now it works, thank you.
"drag & drop them into the Rebelle app"
I'm not clear if this worked correctly. It results in "Import Image As...?" dialog. I guessed at New Artwork button, but don't know how to confirm the brushes have been updated.
Hello, you have to drag & drop the entire .zip file (do not unpack it).
After the installation you should get a pop-up window with the info: "New assets were installed".
Great job, serious update, the program is really different now. So many changes that it takes time to try everything in practice. I like it all very much. Don't stop! :)
This update is "killer"! Done very well. +++1
Do the papers need to be reinstalled? or are the paper updates internal to the 7.1 update?
Papers are automatically updated in 7.1, no need for reinstallation.
thank you. nice update!